Changelog
Follow new updates and improvements to Templated - API for Automated Image, Video and PDF Generation.
May 26th, 2026
New
Hey everyone!
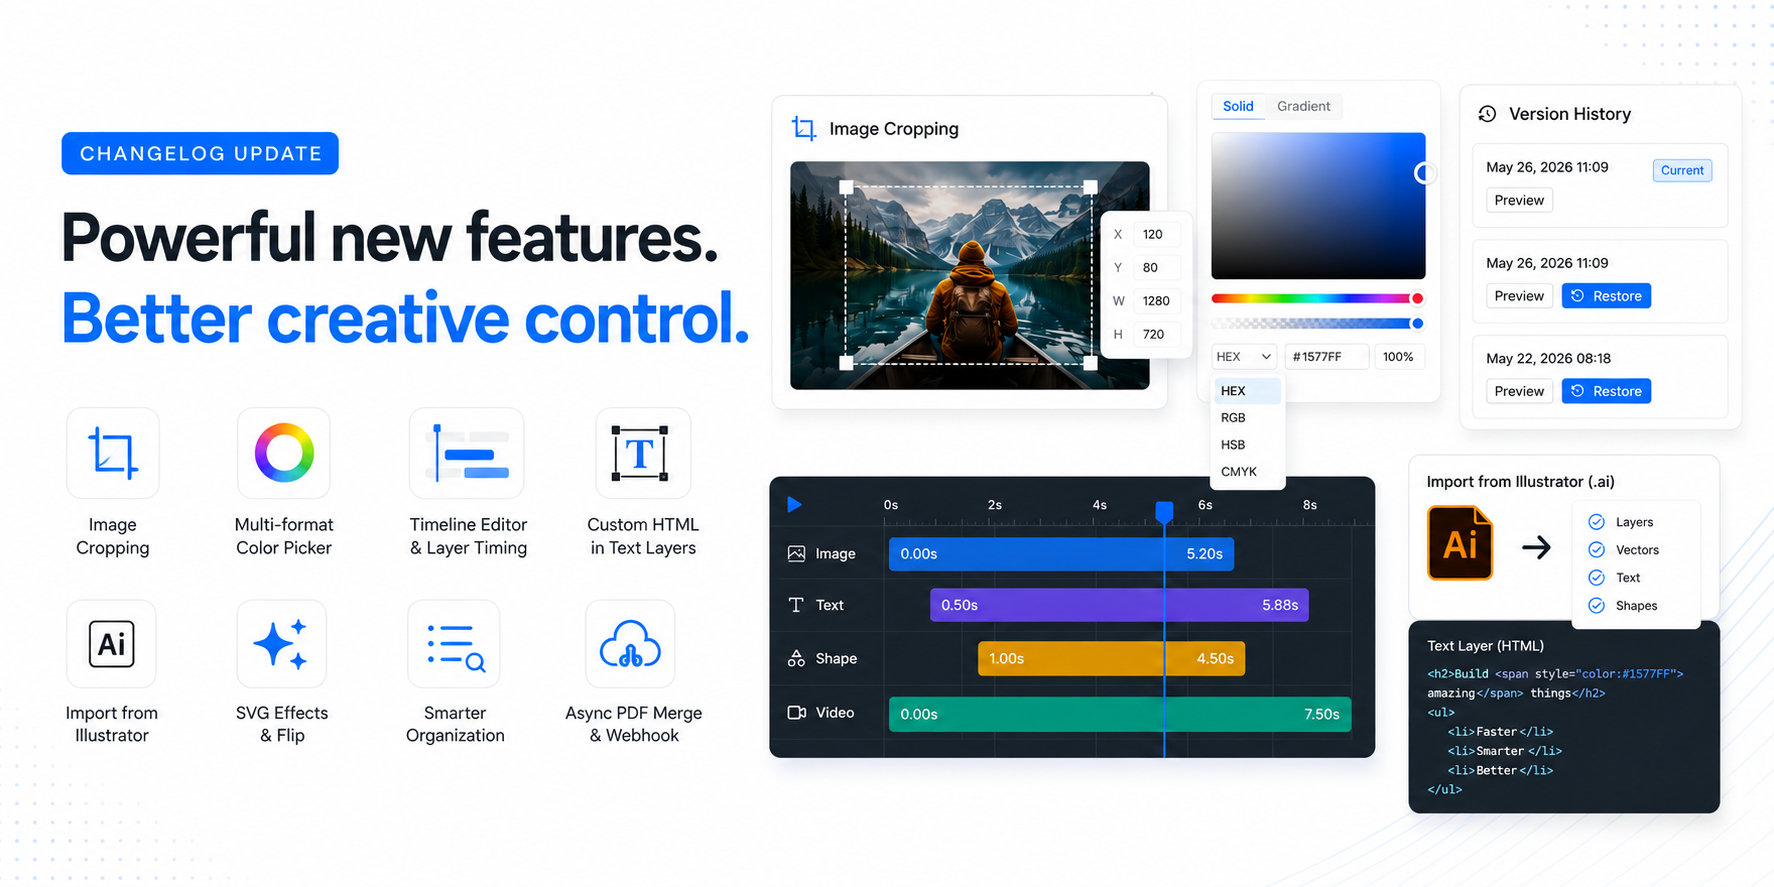
It's been a while since the last update, but we've been busy shipping. Here's everything new in the last couple of months, from the long-awaited Version History to new import options, image cropping, and API additions.
Template Version History
One of the most requested features is finally here! Templates now keep a full version history, so you can browse previous versions and restore them with one click.
Every time you save, a version snapshot is created. You can preview any past version and go back to it if something goes wrong. No more losing work or asking us to recover a template.
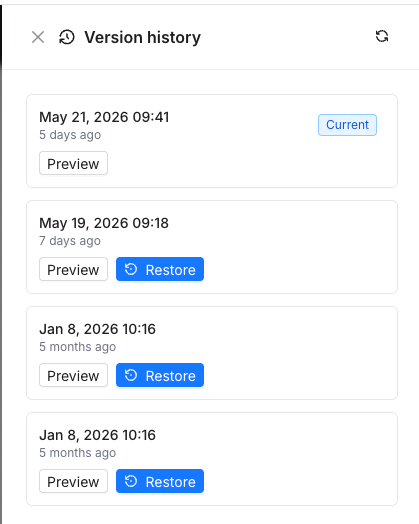
Whether you accidentally deleted layers, want to compare changes, or just need to undo a bad edit from last week, version history has you covered.
Live Text Autofit While Typing
Another highly requested one! Text autofit now updates in real-time as you type. No more saving or clicking away to see how your text fits, it adjusts the font size instantly as you edit.
We also added a new Shrink autofit mode that only reduces the font size (never increases it). Set your max font size and the text will only shrink to fit, keeping your design consistent.
Improved Image Cropping
You can now better crop images directly in the Editor. Select any image layer, enable cropping (double click on the image layer), and adjust the visible area with precision controls for X/Y position.
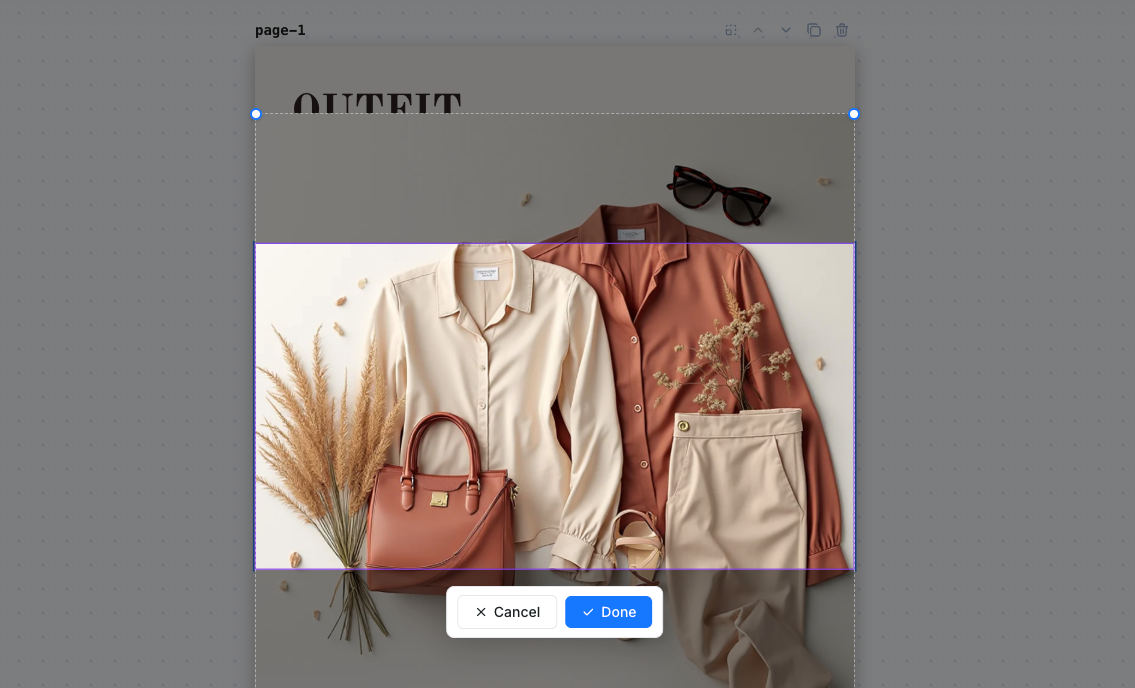
This also works via the API with the new crop_x and crop_y parameters, so you can control exactly which part of an image is visible when rendering programmatically.
Gallery Fonts API Endpoint
New API endpoint GET /v1/fonts/gallery with search and pagination. You can now browse our full font library programmatically, search by name, and paginate through results.
This was a popular request from developers building custom font selection UIs on top of our embedded editor or API.
Import from Illustrator (.ai)
You can now import Adobe Illustrator files directly into Templated! Upload any .ai file and we'll extract your layers, vectors, text, and positioning into an editable template.
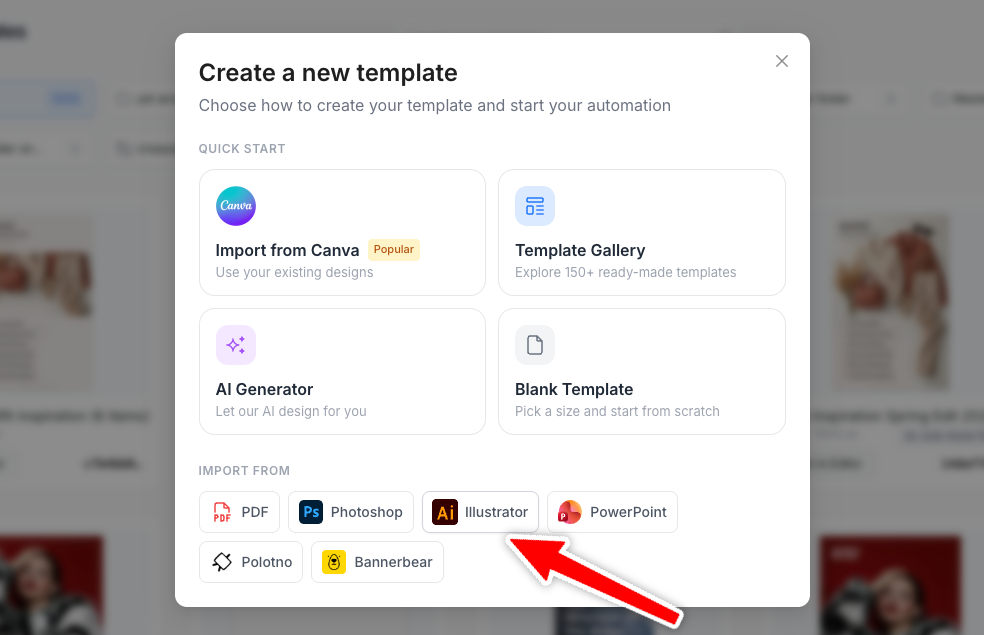
This joins our existing Canva and other import options, so whether your designs live in Illustrator, Canva, or PDF, you can bring them into Templated and automate them via the API.
Multi-format Color Picker (HEX, RGB, HSB, CMYK)
The color picker now supports multiple color formats. Switch between HEX, RGB, HSB, and CMYK directly in the picker. Great for print designers who need precise CMYK values or developers working with specific color formats.
Timeline Editor with Layer Timing Controls
The video timeline editor got a major upgrade. You can now control the exact start and end time of each layer directly from the timeline, with a new dark theme for better visibility.
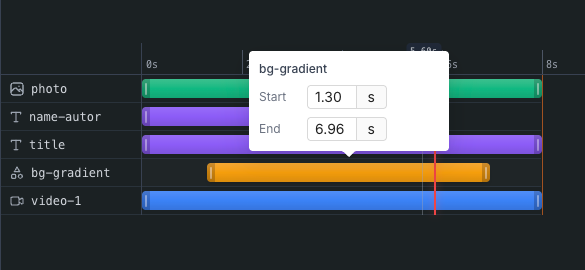
This makes it much easier to fine-tune your video templates. Control when each element appears and disappears without guessing.
SVG Flip & Filter Effects
SVG layers now support flip (horizontal/vertical) and filter effects like blur, brightness, contrast, and more. Combine them for creative variations, all controllable via the API.
More Improvements
Folder Search & Collapse
The folder panel now has a search bar and collapse/expand functionality. Find your folders instantly, even if you have hundreds.
Japanese Language Support
The editor UI is now available in Japanese (日本語), joining English, Spanish, Portuguese, French, German, Dutch, Chinese, and Czech.
Async PDF Merge with Webhook
PDF merge requests can now run asynchronously with webhook delivery. Send your merge request, and we'll POST the result to your webhook URL when it's ready. No more polling.
Custom Filename for Merged PDFs
You can now specify a custom filename when merging PDFs via the API using the filename parameter.
Embed Editor: Download Event
The embedded editor now fires a DOWNLOAD postMessage event, so your host application can listen for when users download their renders.
Preserve Ratio for SVG Layers
New preserve_ratio API parameter for SVG layers. When enabled, the SVG maintains its original aspect ratio when resized. Useful for logos and icons that shouldn't be stretched.
Mobile Preview Modal
Mobile users now get a preview modal when downloading images, making it easier to review renders on smaller screens.
Fixes
Opacity restoration: Fixed a bug where layer opacity was being reset to default values on static layers during video playback, making components unselectable
Video rendering dimensions: Fixed an issue where odd-pixel dimensions
List rendering: Restored native
<ol>and<ul>rendering in text layersText alignment: Fixed incorrect default alignment value when processing templates
Canvas translation: Prevented browser auto-translate from breaking canvas content in the editor
Canva import: Improved robustness of the Canva import parser
Zoom & auto-center: Improved zoom calculation so templates are properly centered when opened
That's it for this update!
A lot of quality-of-life improvements and some powerful new features. As always, let us know what you'd like to see next on our feedback board.
Until
March 3rd, 2026

Hey everyone!
We've been heads down building, and this is one of our biggest updates yet. From a fully responsive Mobile Editor to RTL support, pages with different sizes, a brand-new Anchor System, and much more — there's a lot to unpack. Let's dive in.
Mobile Editor
The editor now works on mobile devices. The entire layout adapts to smaller screens — the sidebar transforms into a bottom tab bar, template selection becomes a full-screen modal, and all controls are touch-friendly with adjusted zoom and pan behavior.
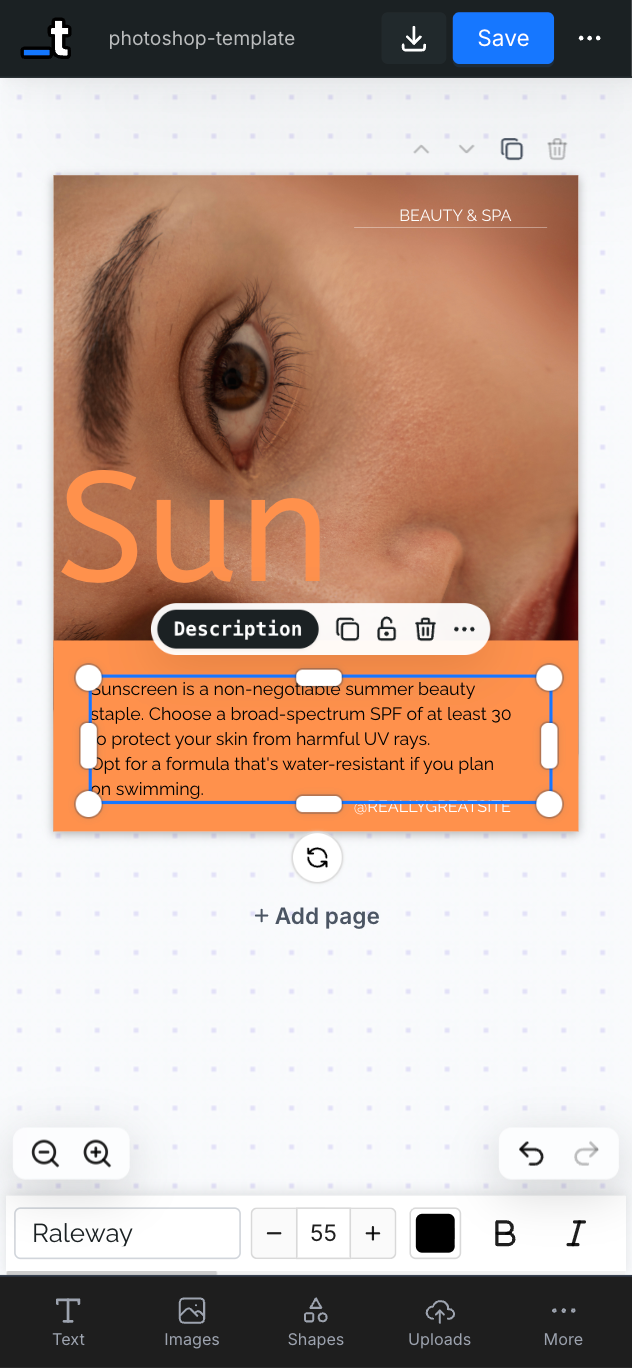
Whether you're making a quick edit on the go or reviewing a template from your phone, the experience is smooth and intuitive.
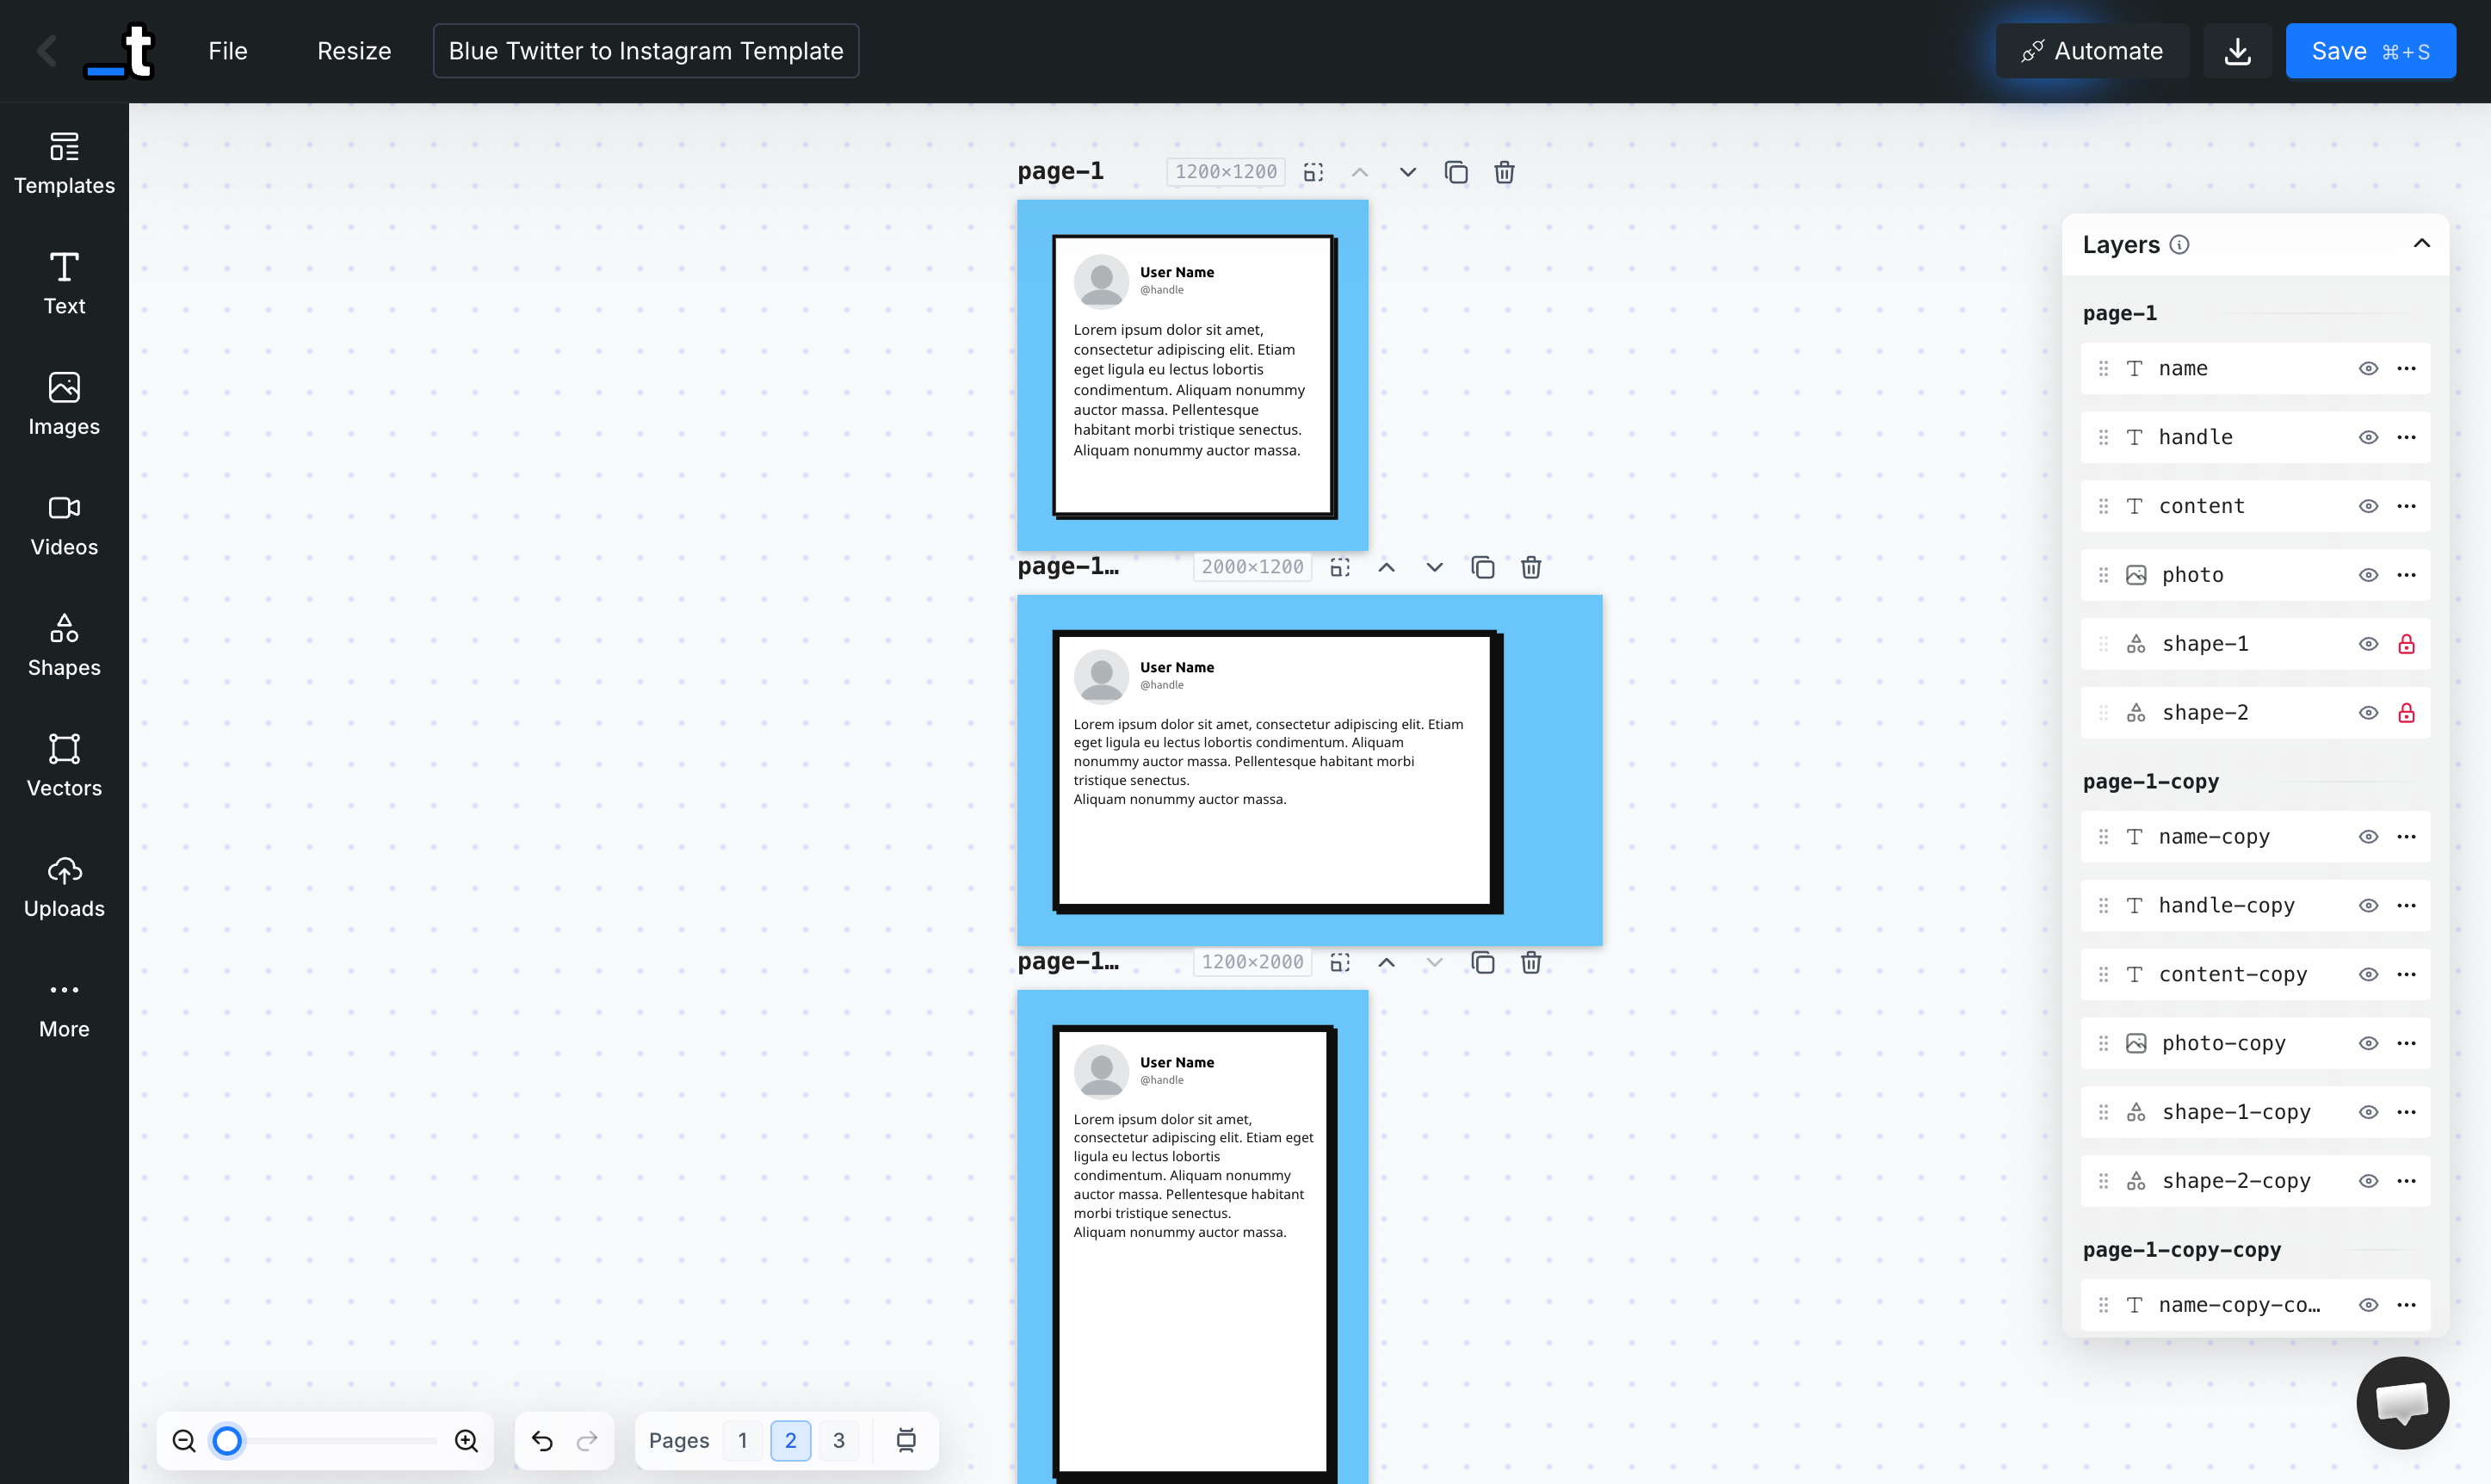
Pages with Different Sizes
Multi-page templates are no longer limited to a single size. Each page can now have its own width and height, independently. The page header shows each page's dimensions, and you can resize any page without affecting the others — perfect for creating documents with mixed layouts, like a social media kit with posts, stories, and banners in a single template.
RTL Support
Full Right-to-Left text support is here. You can set any text layer to RTL, LTR, or Auto mode. In Auto mode, the editor detects Arabic, Hebrew, Persian, Urdu, and other RTL scripts as you type and automatically adjusts the text direction and alignment in real time.
Anchor System (Beta)
Layers can now be anchored to other layers. When the target layer changes size at render time — for example, a text layer that grows due to dynamic content from the API — the anchored layer automatically repositions itself relative to it.
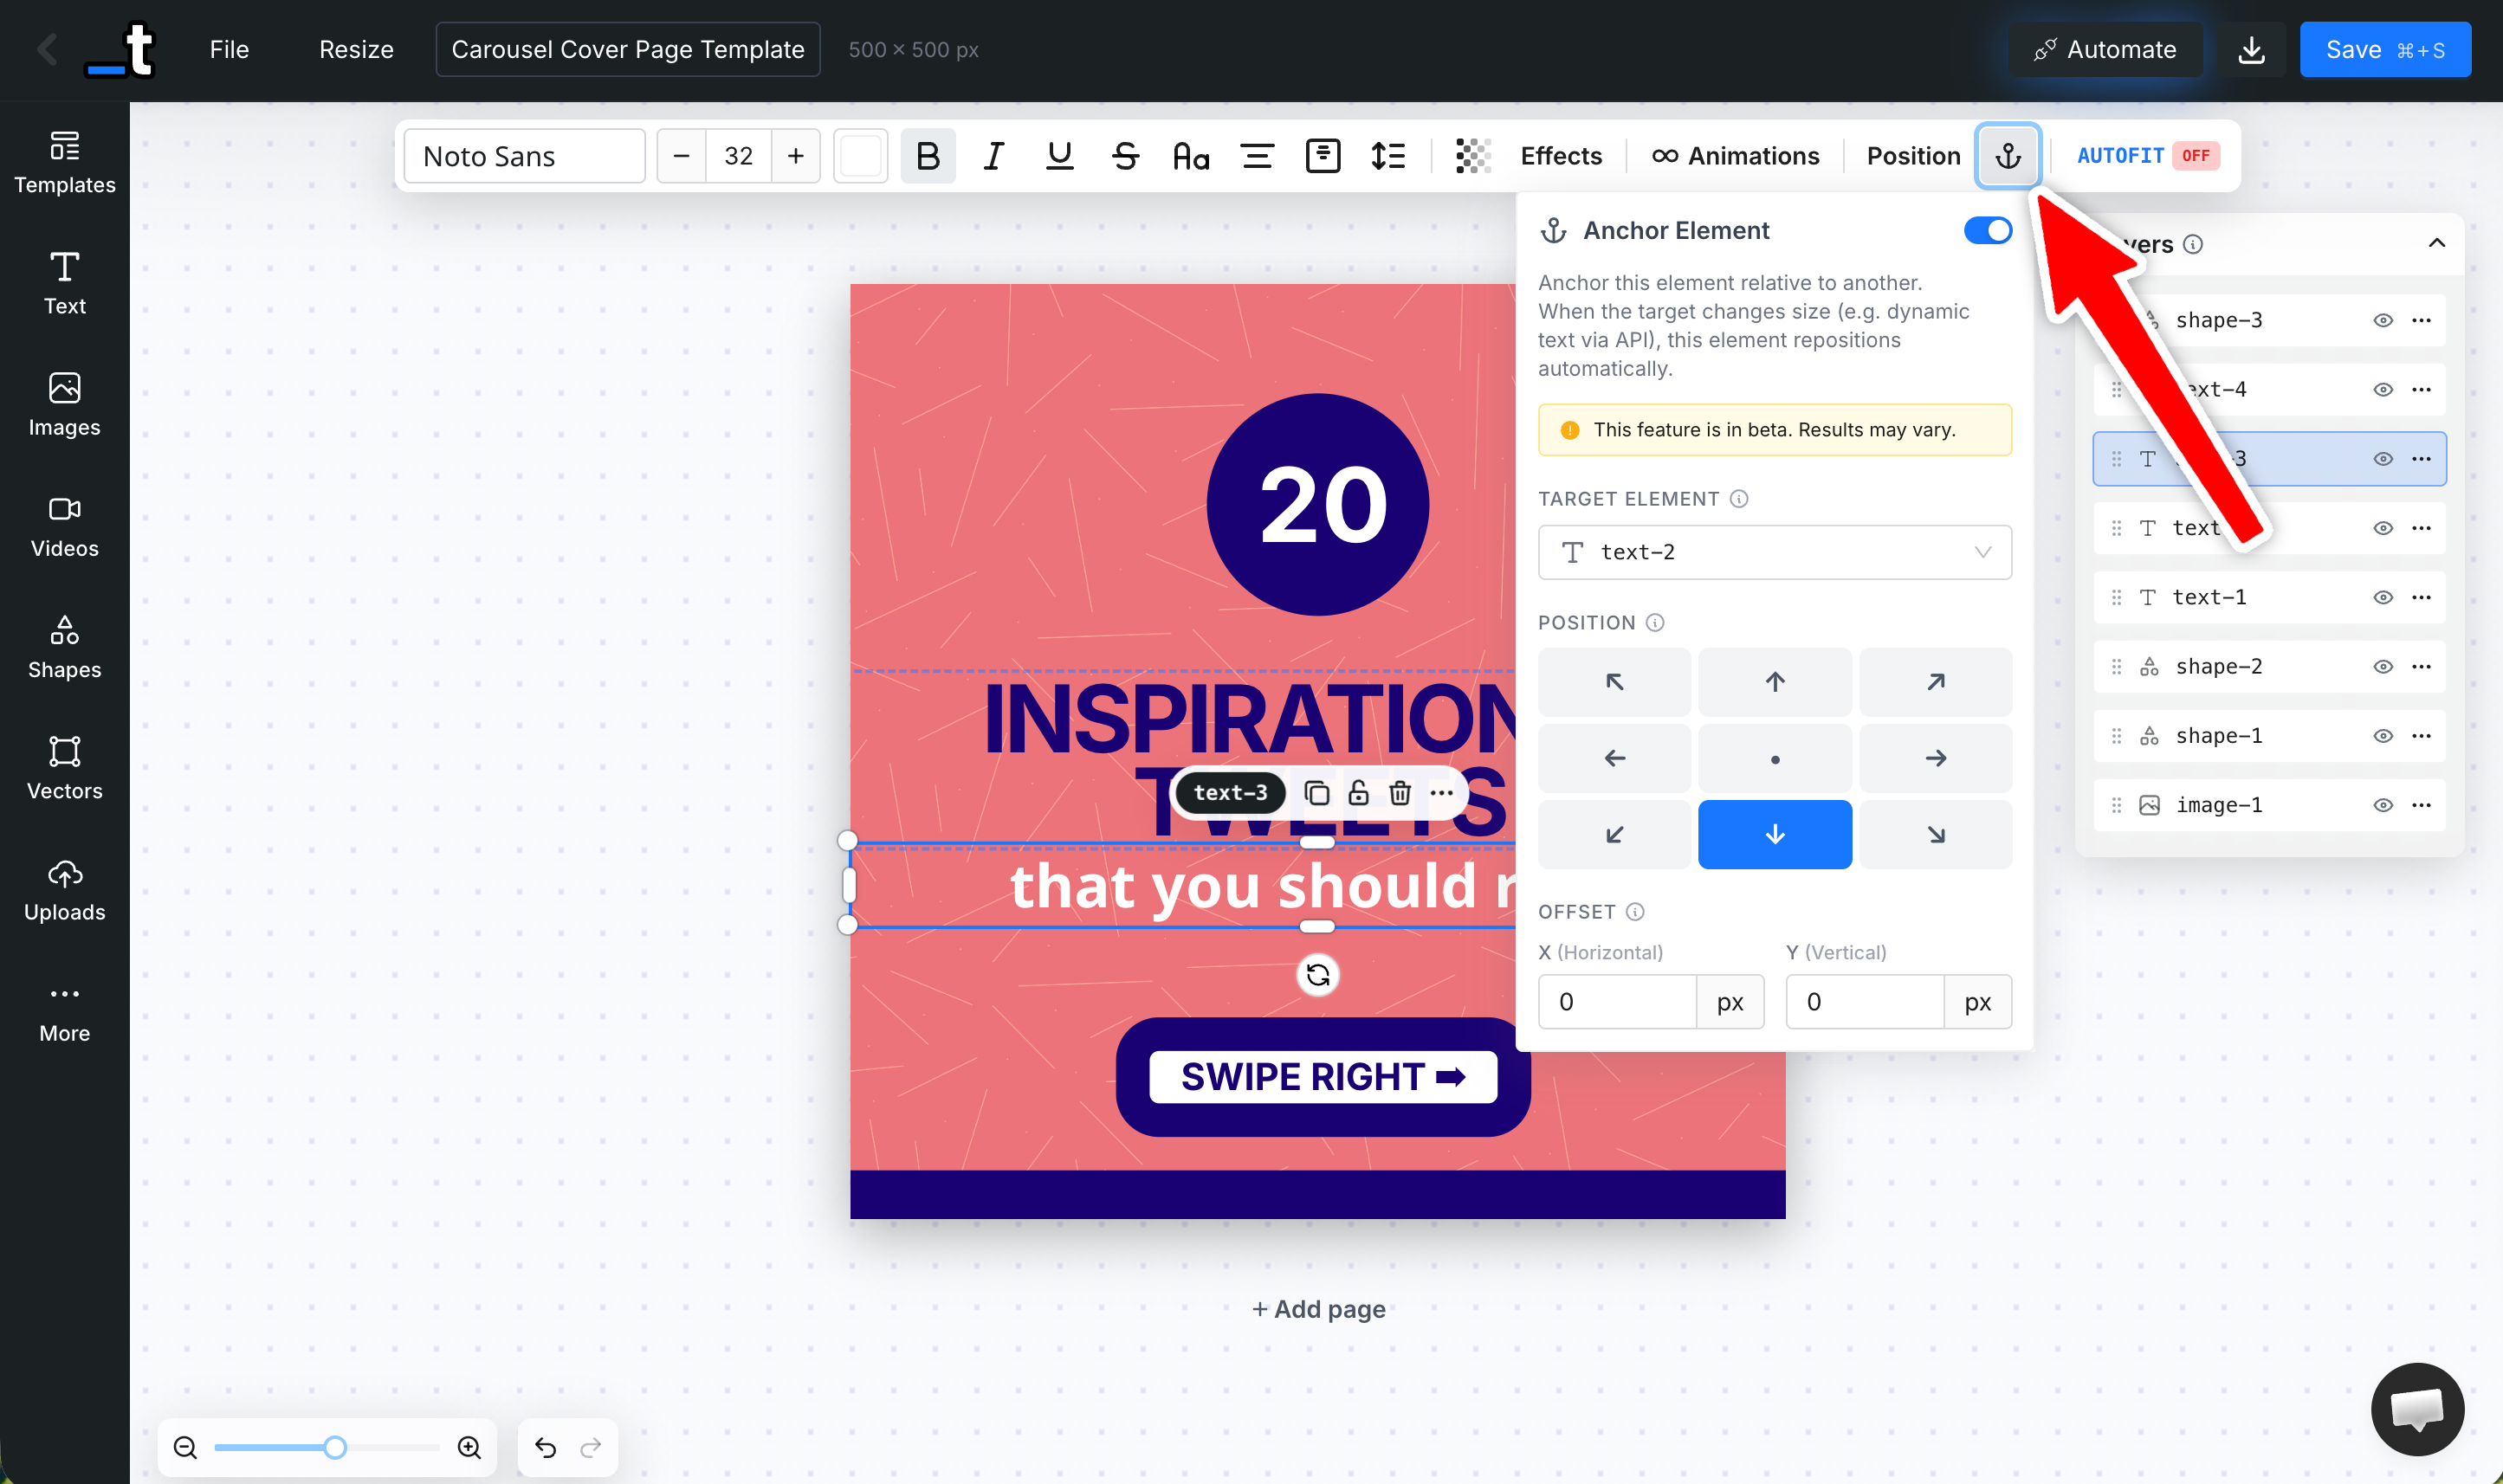
This is a game-changer for dynamic templates where content length varies. Choose from 9 anchor positions (top-left, bottom-center, right-center, etc.) and fine-tune with X/Y offsets. Anchored layers even support chaining — an anchored element can be the target for yet another anchor.
9 anchor positions available
X/Y offset controls for fine-tuning
Cascading anchor chains supported
Target layers automatically get
height: autoso they can grow with content
Soft Edges
Images can now have soft, feathered edges that fade smoothly into the background. Enable it from the Image Effects panel and control the edge size, corner roundness, and background fill color.
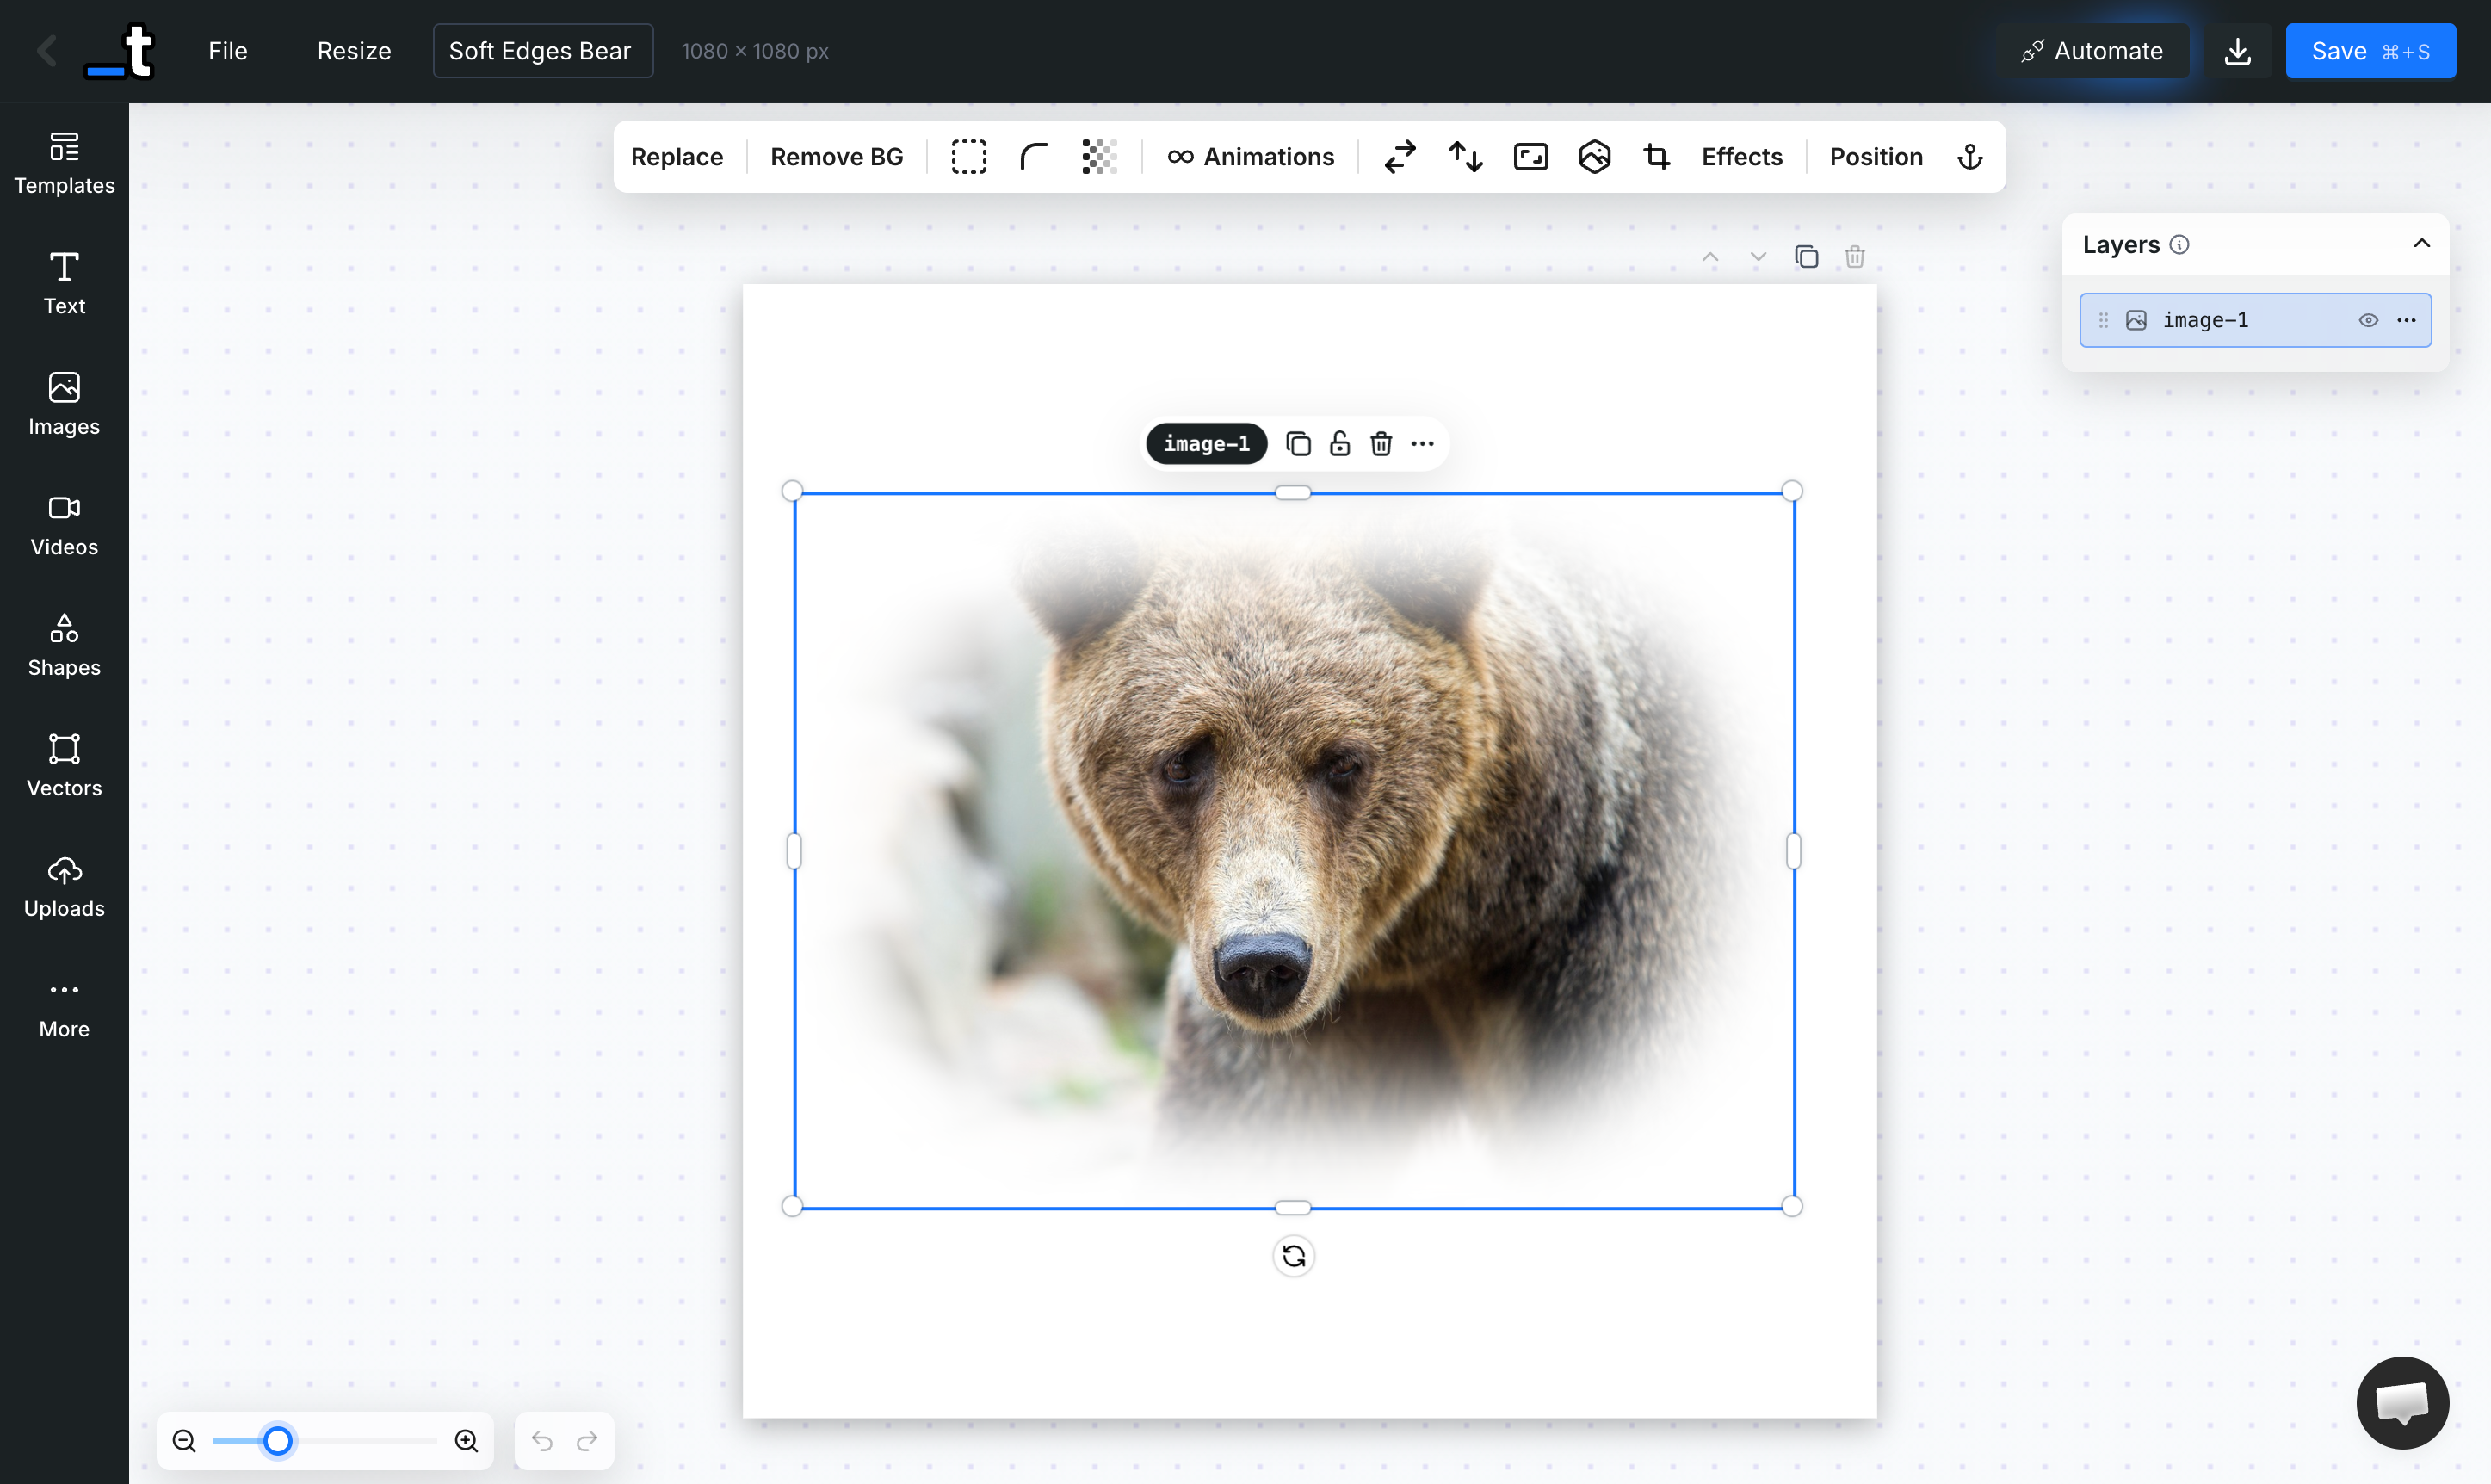
Under the hood, this uses a Gaussian-blurred canvas mask — so it looks great at any resolution and renders perfectly via the API.
Custom SVG Mask
Beyond the built-in shape masks (circle, hexagon, star, etc.), you can now upload any custom SVG file to use as a clipping mask on an image layer. The SVG is automatically cleaned up — metadata stripped, fills normalized — and applied as a mask. This opens up endless creative possibilities for custom-shaped image frames.
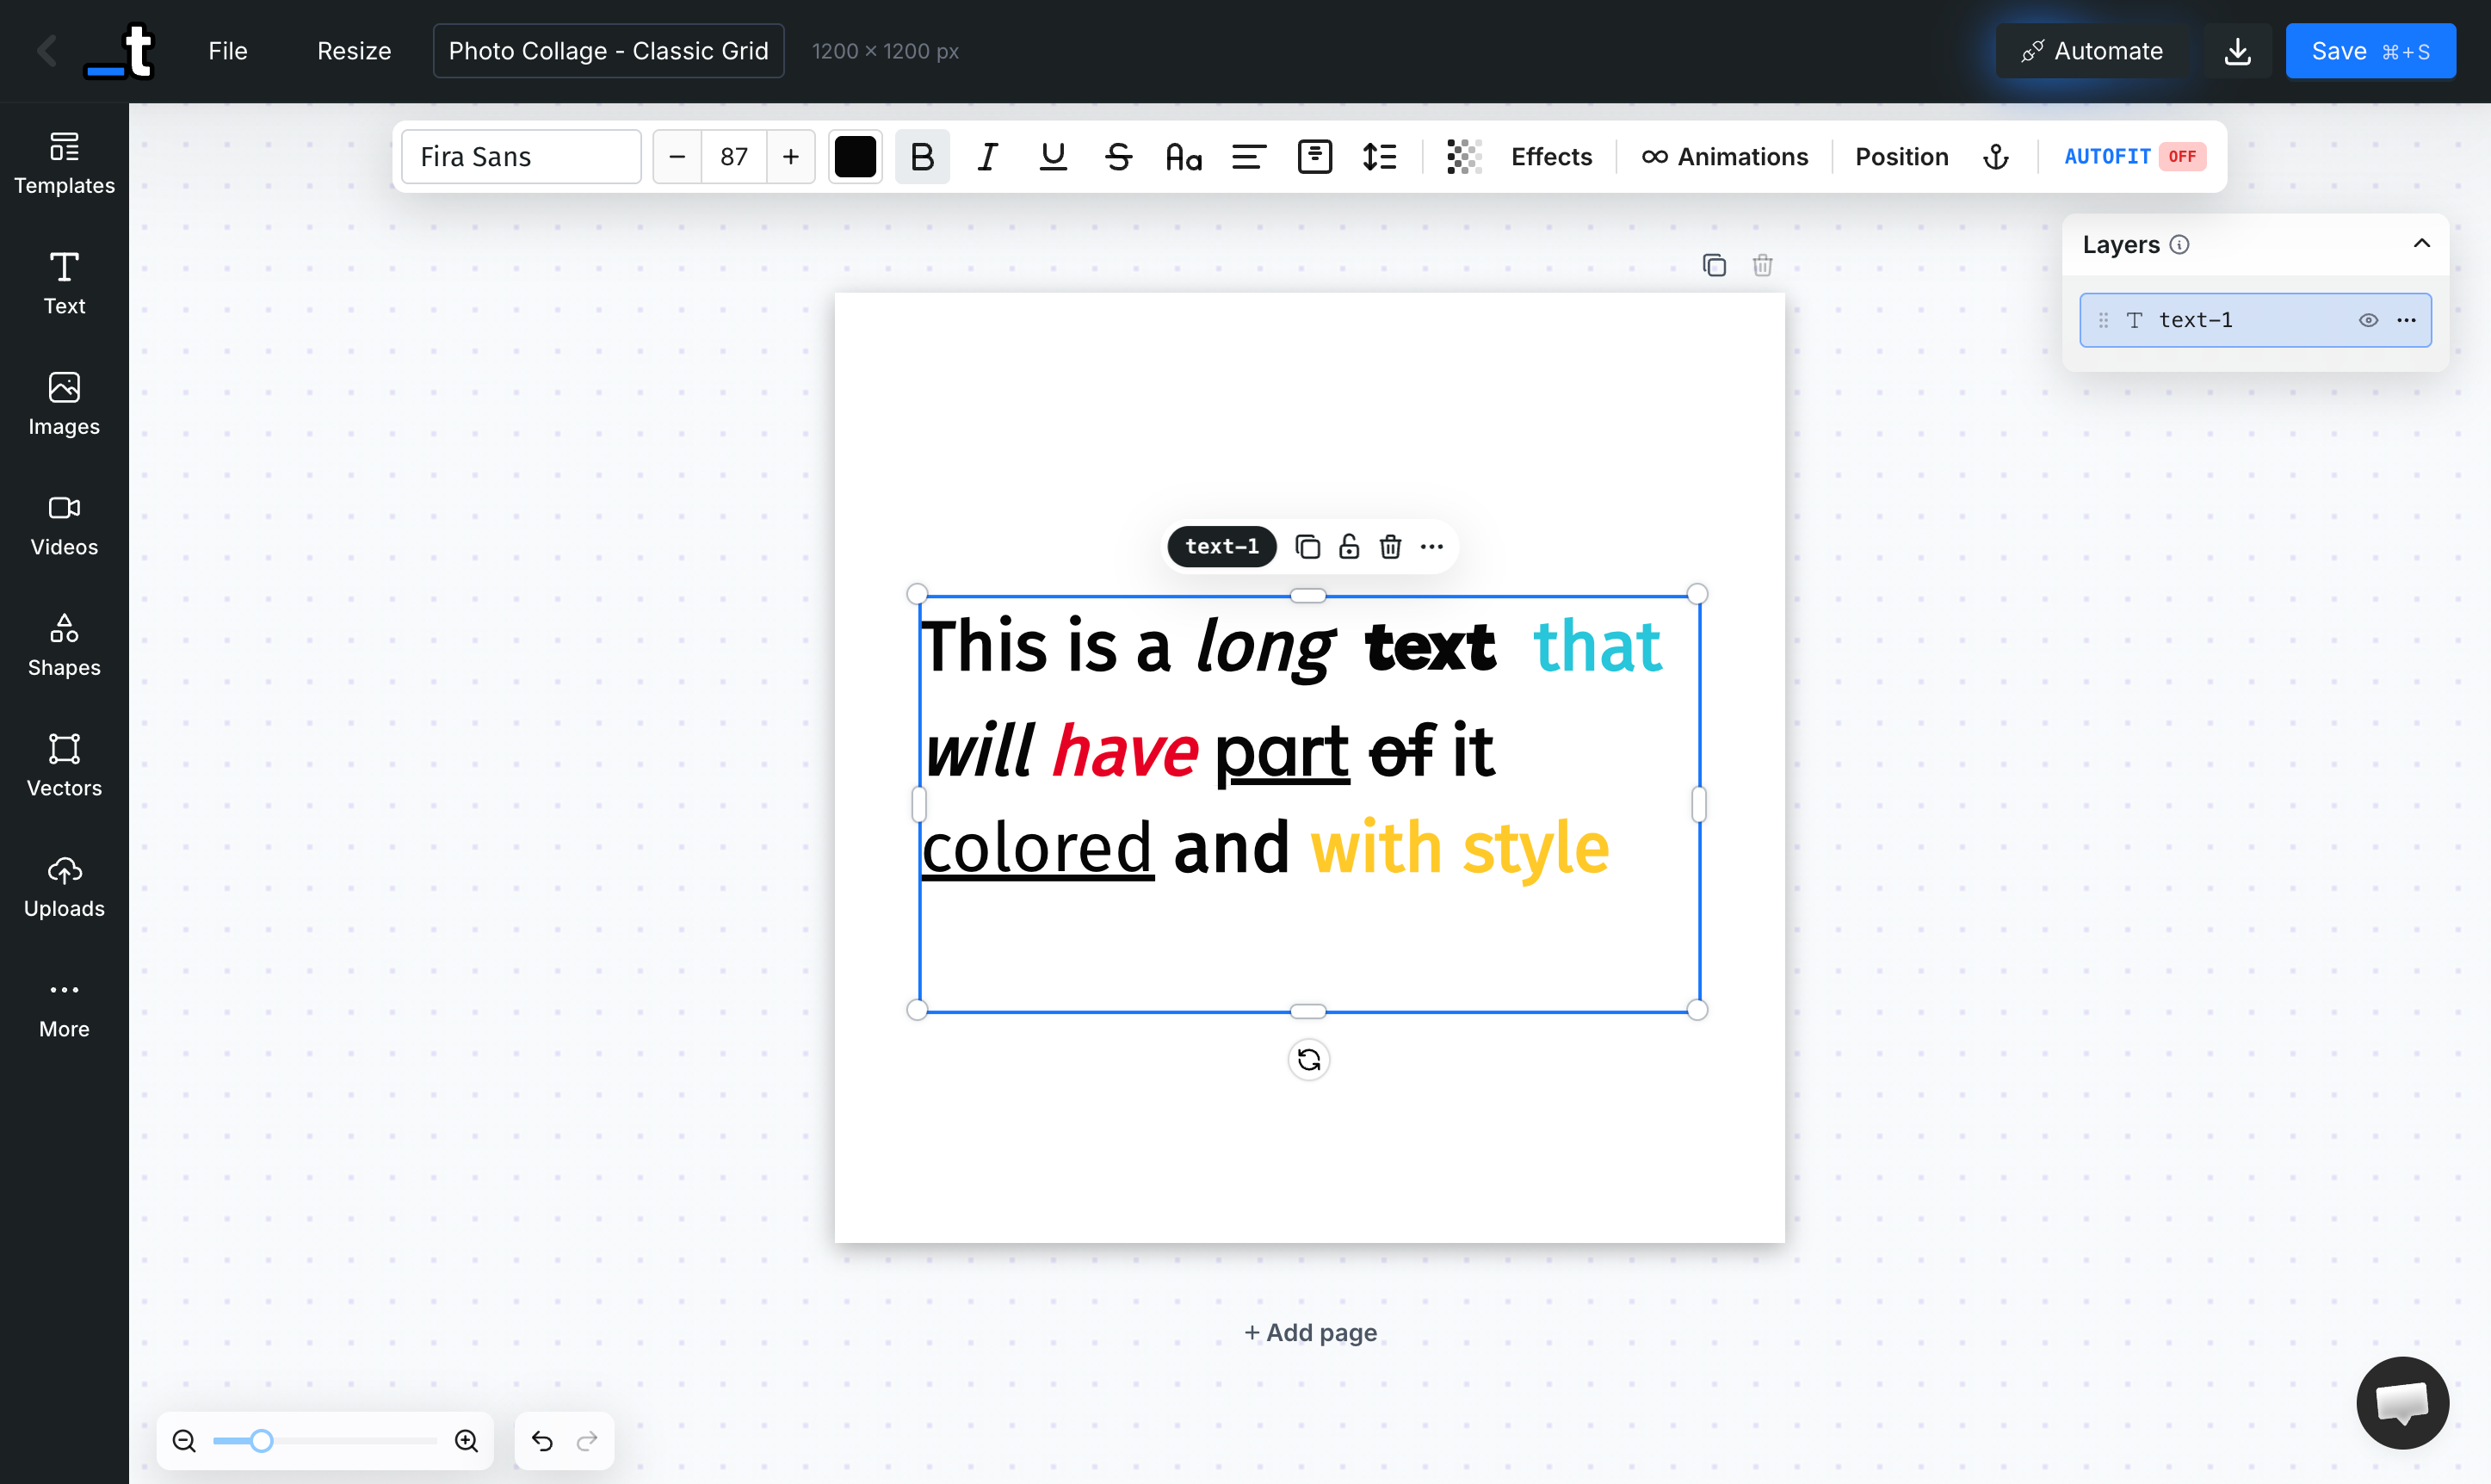
Inline Text Styling
You can now finally style text to parts of your text layer!
Double-click to enter edit mode, select a portion of text, and apply bold, italic, underline, strikethrough, color or font family — just to that selection.
No more needing separate text layers for differently styled words within the same block.
Print Safe Zone
A new toggle in the File menu overlays a red-shaded border on each page, showing the print safe zone — the area where important content should be kept to avoid being cut during trimming. You can also adjust the safe zone width via a slider to match your print provider's specifications.
Animation Params in the API & MCP
Render API and MCP server now support a full animation parameter on each layer for video (MP4) renders. Control entrance, looping, and exit animations programmatically:
{
   "layers":{
      "title":{
         "text":"Hello World",
         "animation":{
            "in":{
               "type":"slide",
               "direction":"left",
               "duration":500
            },
            "loop":{
               "type":"pulse",
               "duration":1000
            },
            "out":{
               "type":"fade",
               "direction":"out",
               "duration":300
            },
            "start":0,
            "end":5000
         }
      }
   }
}
You can also use the Templated MCP or our AI Generator to create a video template with a prompt like this:
“An animated video template for TikTok/Reels in 1080x1920 portrait format. Include a bold animated title that slides in, a subtitle that fades in, and a pulsing call-to-action button. Use a dark gradient background with vibrant accent colors. Stagger the animations so elements appear one after another. 8 seconds duration.”
Font Detection for Faster Renders
The renderer now analyzes the content of the render to detect exactly which fonts are used and loads only those. This significantly reduces network overhead and speeds up render times, especially for templates using just a few fonts.
We are seeing around 25% faster render times!
From around 2.2 seconds now down to 1.8 seconds ⚡
Template Gallery API Endpoint
A new public endpoint — GET /v1/templates/gallery — lets you browse our gallery of professionally designed templates via the API. Filter by keyword, category, tags, dimensions, and paginate through results.
Optionally include layer definitions for deeper integration:
GET /v1/templates/gallery?query=instagram&category=social-media&limit=10&includeLayers=trueMore Improvements
Search by Template ID
You can now paste a template UUID directly into the Dashboard search bar to find a specific template instantly — in addition to searching by name or tag.
Auto-Folder on Template Creation
When you create a new template while browsing a folder, it's automatically placed in that folder. No more manual "Move to Folder" step after creation. Works for all creation methods — blank, AI generation, Canva import, PDF import, PSD import.
Remove Page Without Confirmation
Deleting a page now shows a "Don't ask again" checkbox in the confirmation popup. Check it once, and all future page deletions skip the confirmation. You can re-enable it anytime from the same popover.
New Languages: German, Dutch, Chinese & Czech
The editor UI is now available in German, Dutch, Chinese Simplified, and Czech, joining English, Spanish, Portuguese, French, and German — bringing us to 8 supported languages.
Embedded Editor: Hide Tabs
New hide-tabs parameter for the embedded editor. Pass a comma-separated list of tabs to hide:
?hide-tabs=videos,uploads,qr-code,barcodeAvailable tabs: text, images, videos, shapes, vectors, uploads, qr-code, barcode, rating
Embedded Editor: Template Selection
New allow-template-selection=true parameter for the embedded editor. When enabled, end users can browse and switch templates from within the embedded editor via a Templates Gallery tab.
😮💨 That was a lot!
Thanks all for all the suggestions and bug reports.
You definitely helps us build a better tool!
As always, feel free to add more suggestions in our feedback board.
Until the next one,
Pedro
January 28th, 2026
We're excited to announce our new MCP (Model Context Protocol) integration that lets you create, edit, and manage templates directly from AI assistants like Claude, Cursor, and ChatGPT - all using natural language.
Demo video showing template creation and render generation with the MCP integration
Create Templates by Describing Them
No more dragging and dropping. Just tell your AI assistant what you want:
> "Create a template for Instagram posts with a background image, a bold title at the top, and a subtitle at the bottom"
The AI will create the template with all the layers, positioning, and styling - ready to use.
Edit Templates Through Conversation
Need to make changes? Just ask:
> "Make the title bigger and move it to the center"
> "Add a logo layer in the top-right corner"
> "Change the background color to dark blue"
The AI understands your template structure and makes the changes for you.
Full Templated Control
Beyond template creation, you get access to all Templated features:
Generate renders - Create images, videos, and PDFs from your templates
Clone & organize - Duplicate templates, create folders, manage your library
Upload assets - Add images and custom fonts through conversation
Inspect & debug - Ask "What layers does this template have?" to understand any template
Example Prompts
Supported AI Assistants
Get Started in 2 Minutes
Go to Integrations → MCP
Copy the configuration for your AI assistant
Paste it and restart your assistant
Start creating: "Create a social media template with..."
Resources
We'd love to hear what you think! If you have any feedback or run into any issues, feel free to reach out to us via chat or at support@templated.io or share your thoughts on our feedback board.
Happy creating! 🎨
Pedro
January 17th, 2026
We're thrilled to announce one of the most requested features: Teams is now live in Templated! 🎉
This is a big step forward for agencies, companies, and teams who want to collaborate on templates and share resources seamlessly.
✨ What's New
Shared Assets
All your templates, uploads, fonts, and renders now belong to your team.
Everyone on your team has access to the same resources. No more duplicating files or sharing credentials.
Invite Team Members
Invite colleagues to your team via email.
They'll receive an invitation link and can join your workspace instantly.
Role-Based Permissions
Assign roles to control what each team member can do:
Owner — Full access to billing, team settings, and all features
Developer — Can create templates, access the API, and manage renders
Designer — Can edit templates and upload assets (no API access)
Team Members Per Plan
Need more seats? Contact us and we'll work something out.
🚀 How to Get Started
Go to Settings from the dropdown on the top right → Team Management
Click Invite Member
Enter your colleague's email and select their role
They'll receive an email invitation to join your team
Once accepted, they'll have access to all your team's templates and resources
💡 What This Means For You
Agencies: Manage client work with your team without sharing logins
Companies: Keep all design assets centralized and accessible
Developers: Grant designers access to edit templates while you focus on the API integration
Everyone: No more "can you send me that template?" messages 😅
🔒 Your Data is Safe
Existing users have been automatically migrated to the new team model. All your templates, uploads, and renders are exactly where you left them — now under your personal team.
That's it for this release!
We're really excited to see how you'll use Teams to collaborate.
As always, let us know if you have any feedback or suggestions.
Happy collaborating! 🎉
Pedro
January 7th, 2026

We're incredibly excited to announce one of the most requested features in Templated's history: Video Rendering is now live!
This is a huge milestone for us and represents a major step forward in our vision to help you fully automate your asset production pipeline — from static images and PDFs to now dynamic video content.
See It in Action
Watch how easy it is to create animated video content with Templated.
What's New?
📹 Video Layers in Templates
You can now add video elements directly into your templates through the Editor. Whether it's a background video, product demo clip, or animated footage — videos are now first-class citizens in Templated.
✨ Animations & Transitions
Bring your designs to life! Add CSS animations and transitions to any layer in your template — text, images, shapes, you name it. Create stunning motion graphics without leaving our Editor.
🚀 Render Videos via API
Use our existing /v1/render endpoint with just a few new parameters:
"format": "mp4"— Output as videoduration— Control video length (up to 90 seconds)fps— Choose your frame rate (up to 60 FPS)
fetch('https://api.templated.io/v1/render', {
  method: 'POST',
  body: JSON.stringify({
    "template": TEMPLATE_ID,
    "format": "mp4",
    "duration": 10000,  // 10 seconds
    "fps": 30,
    "layers": {
      "title": { "text": "Welcome to my video!" },
      "background-video": { "video_url": "https://example.com/video.mp4" }
    }
  }),
  headers: {
    'Content-Type': 'application/json',
    'Authorization': `Bearer ${API_KEY}`
  }
})
Get Started with Video Templates from our Template Gallery
To help you hit the ground running, we've created 5 ready-to-use video templates in our Template Gallery:
Use any of these templates and customize them for your use case — or use them as inspiration to build your own video templates from scratch.
Video Credits
Video rendering uses a credit system based on resolution, FPS, and duration. Check out our documentation for the full breakdown and use the credit calculator to estimate costs.
What this means for you
With video rendering, you can now automate:
Social media video ads at scale
Product videos with dynamic content
Animated thumbnails and promotional clips
Personalized video content for each customer
Motion graphics for marketing campaigns
No more switching between tools. Design once in Templated, render as image, PDF, or video — all through the same API.
Documentation
We've added comprehensive documentation for video rendering:
→ Create a Render (Image, PDF, or Video)
Beta Notice
Video rendering is currently in Beta.
We're actively improving the feature and would love your feedback!
If you encounter any issues or have suggestions, please reach out 🙏.
This is just the beginning. We have more exciting updates planned for video capabilities, and we can't wait to see the amazing videos you'll create with that.
Happy rendering! 🎉
Pedro & the Templated Team
December 16th, 2025

We're excited to introduce Import from PDF — a new way to bring your existing PDF documents into Templated and turn them into fully editable, API-ready templates.
• How It Works
Upload any PDF file and we'll automatically extract:
Text elements — with font detection, sizing, and positioning
Images — uploaded to your media library
Vector shapes — converted to editable SVG layers
Layout structure — preserving the original document design
The result is a complete template you can edit, customize, and automate via the API — just like any other template in Templated.
• When to Use It
Contracts & Legal Documents — Turn your existing contracts into templates with dynamic placeholders
Certificates & Diplomas — Import certificate designs and add personalization fields
Reports & Invoices — Convert PDF reports into automated document generators
Marketing Materials — Bring in brochures or flyers and make them dynamic
• Getting Started
Click "Create Template" from your dashboard
Select "Import from PDF"
Drag and drop your PDF file (or click to browse)
Wait a few seconds while we process the document
Review and edit your new template in the editor
Note: This feature works best with clean, well-structured PDFs. Complex designs with many overlapping elements may need some adjustments after import, but it gives you a great starting point.
Try it out and let us know what you think! 🚀
Best,
Pedro :)
November 30th, 2025
Hello again!
Here's a roundup of everything new we've shipped in November.
We focused on improving the editor experience, adding more PDF options, and making it easier to manage your templates at scale.
• New Color Picker with Template Colors & Recent Colors
We've completely redesigned the color picker!
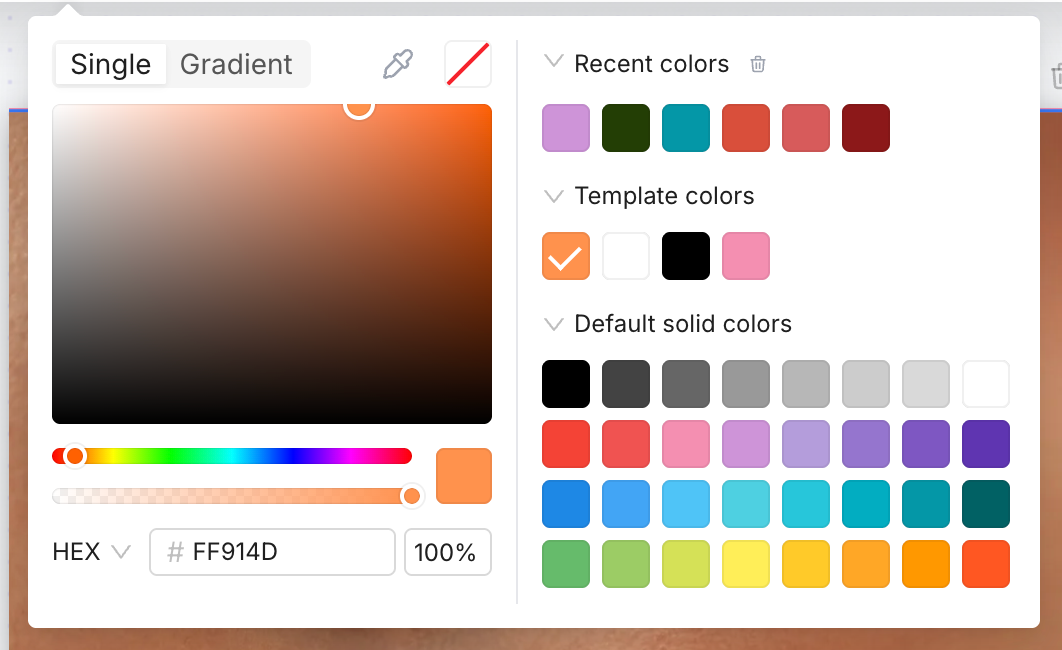
Now when you pick colors in the editor, you'll see:
Recent colors — Automatically remembers your last 16 colors (2 rows), persisted in your browser
Template colors — Shows colors already used in your current template for easy consistency
Default palette — A curated set of 32 colors across grayscale, reds, blues, and greens
Eyedropper tool — Pick any color from your screen (on supported browsers) with the new eyedropper button
You can also clear your recent colors anytime from the color picker panel.
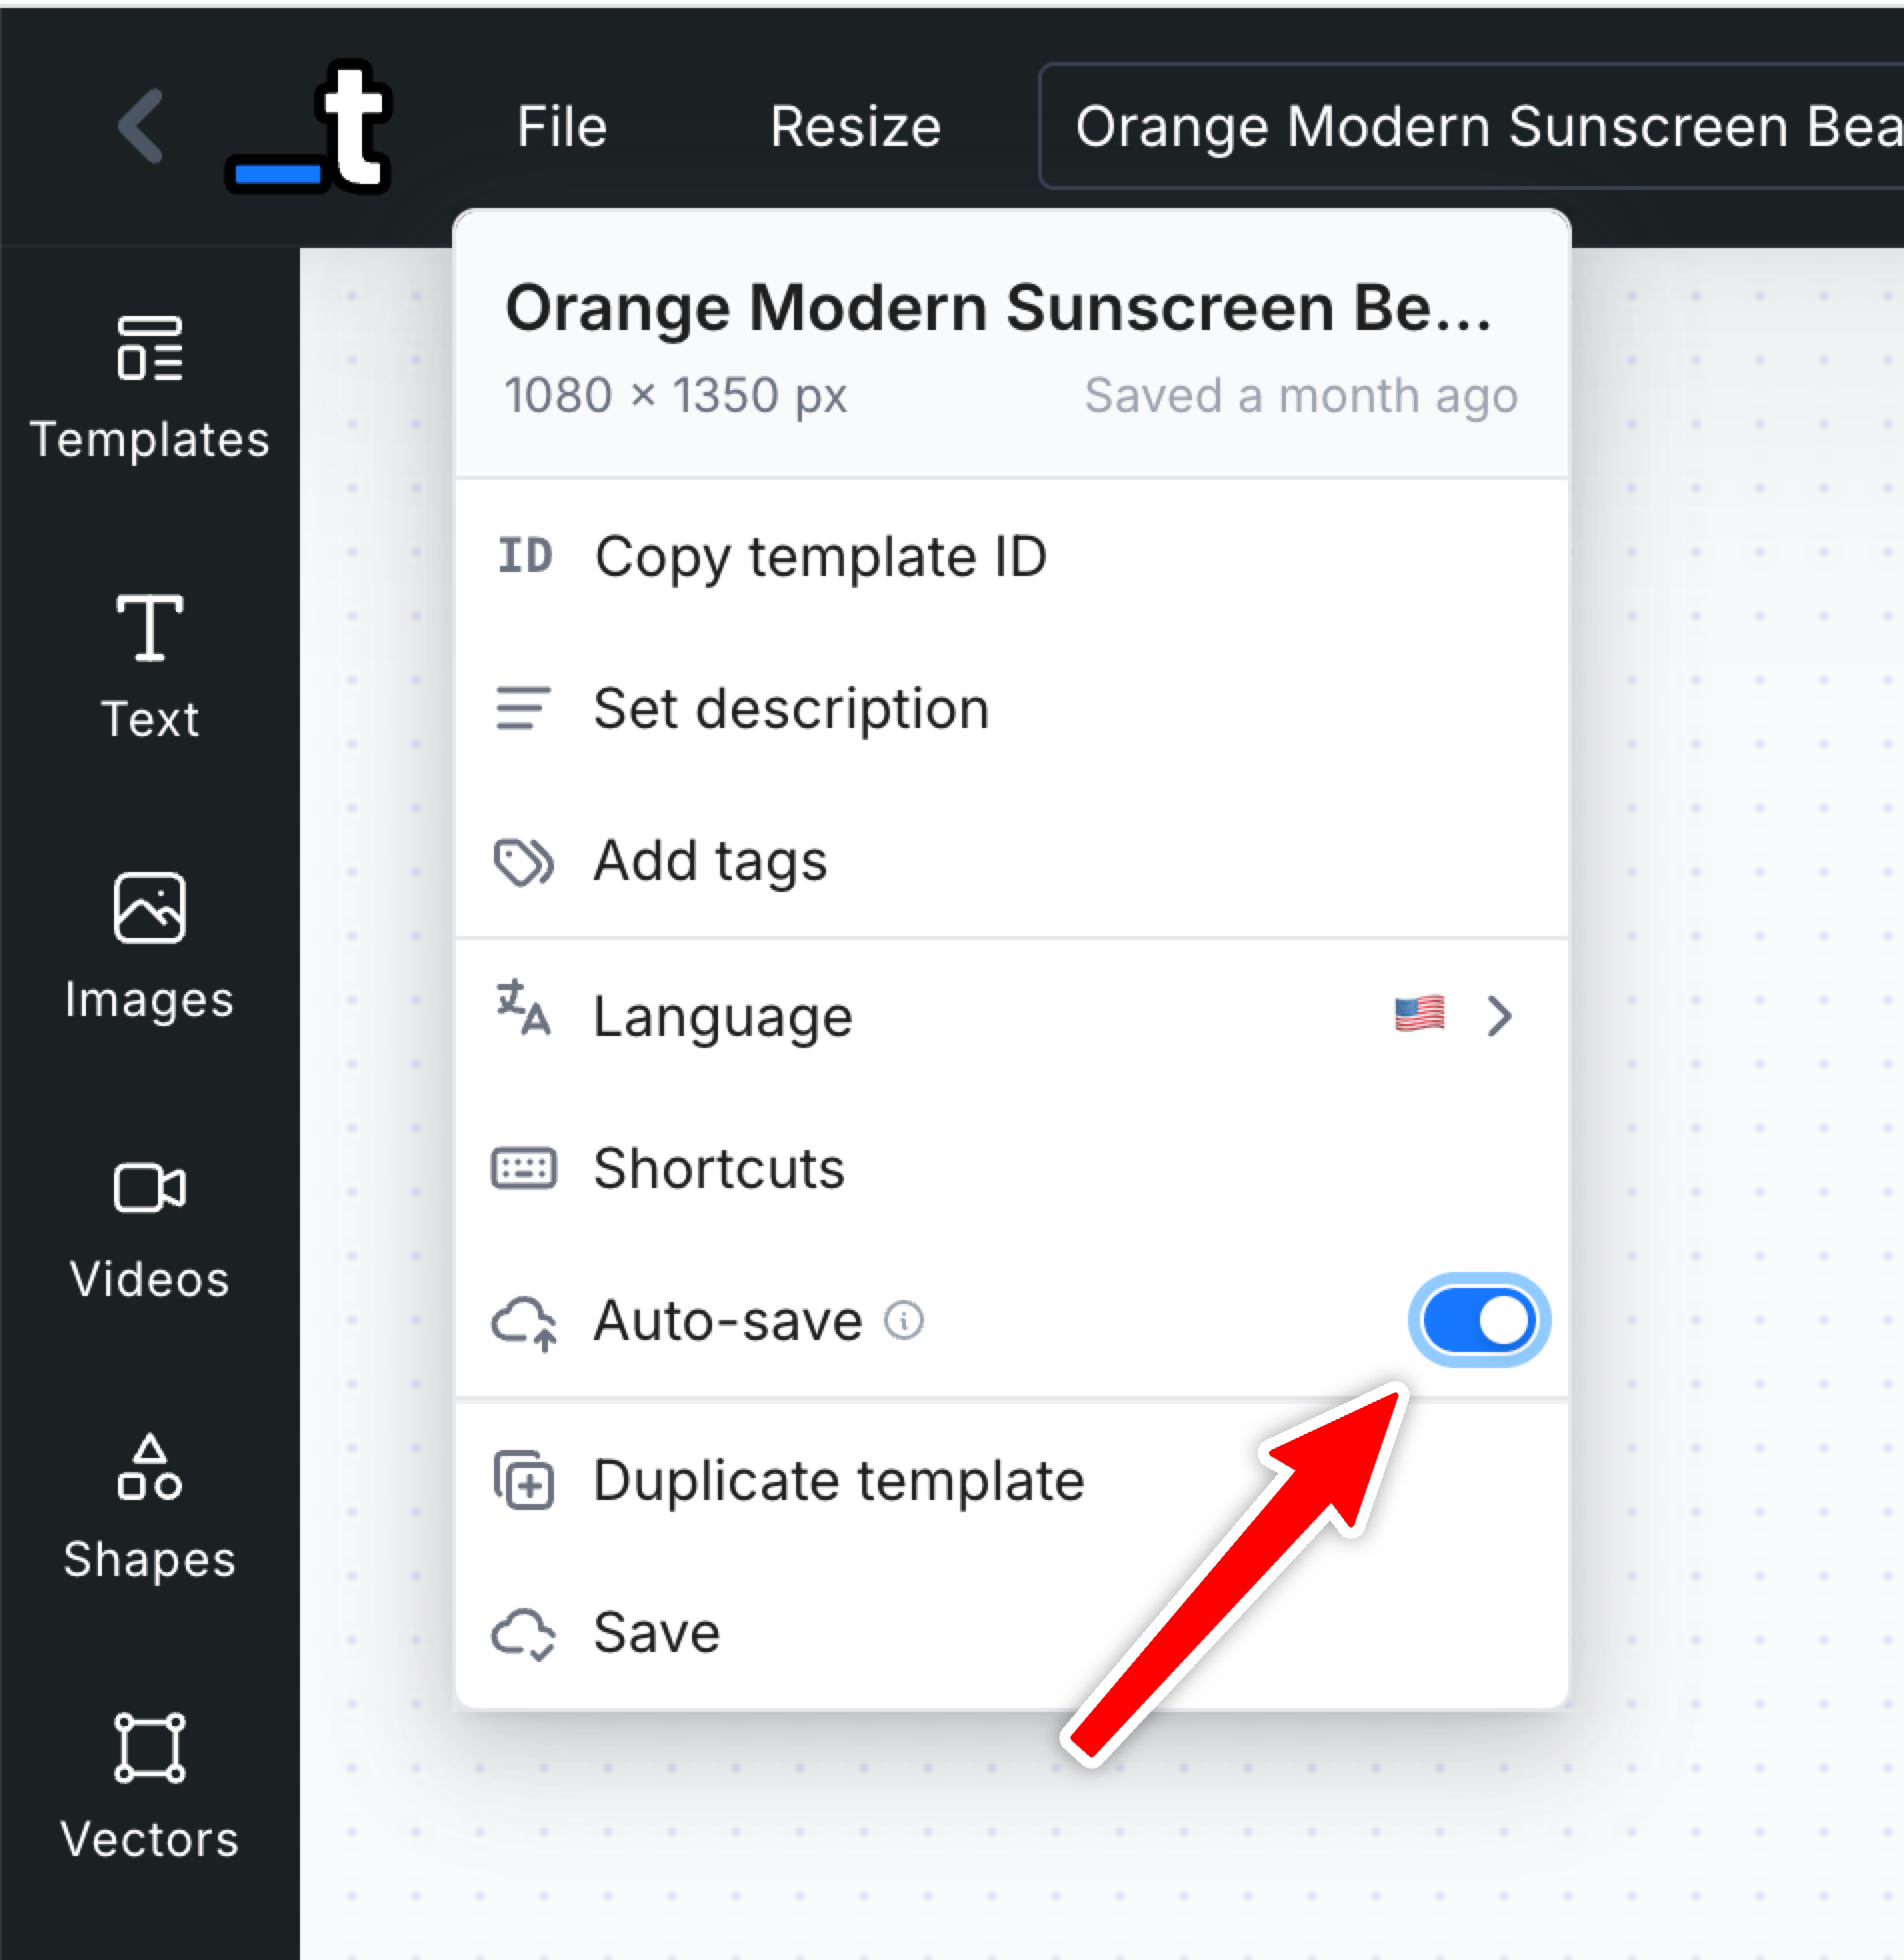
• Auto-save Option in the Editor
No more forgetting to save! Enable auto-save from the File menu and your template will automatically save every 15 seconds. The setting is remembered per browser, so you can enable it once and forget about it.
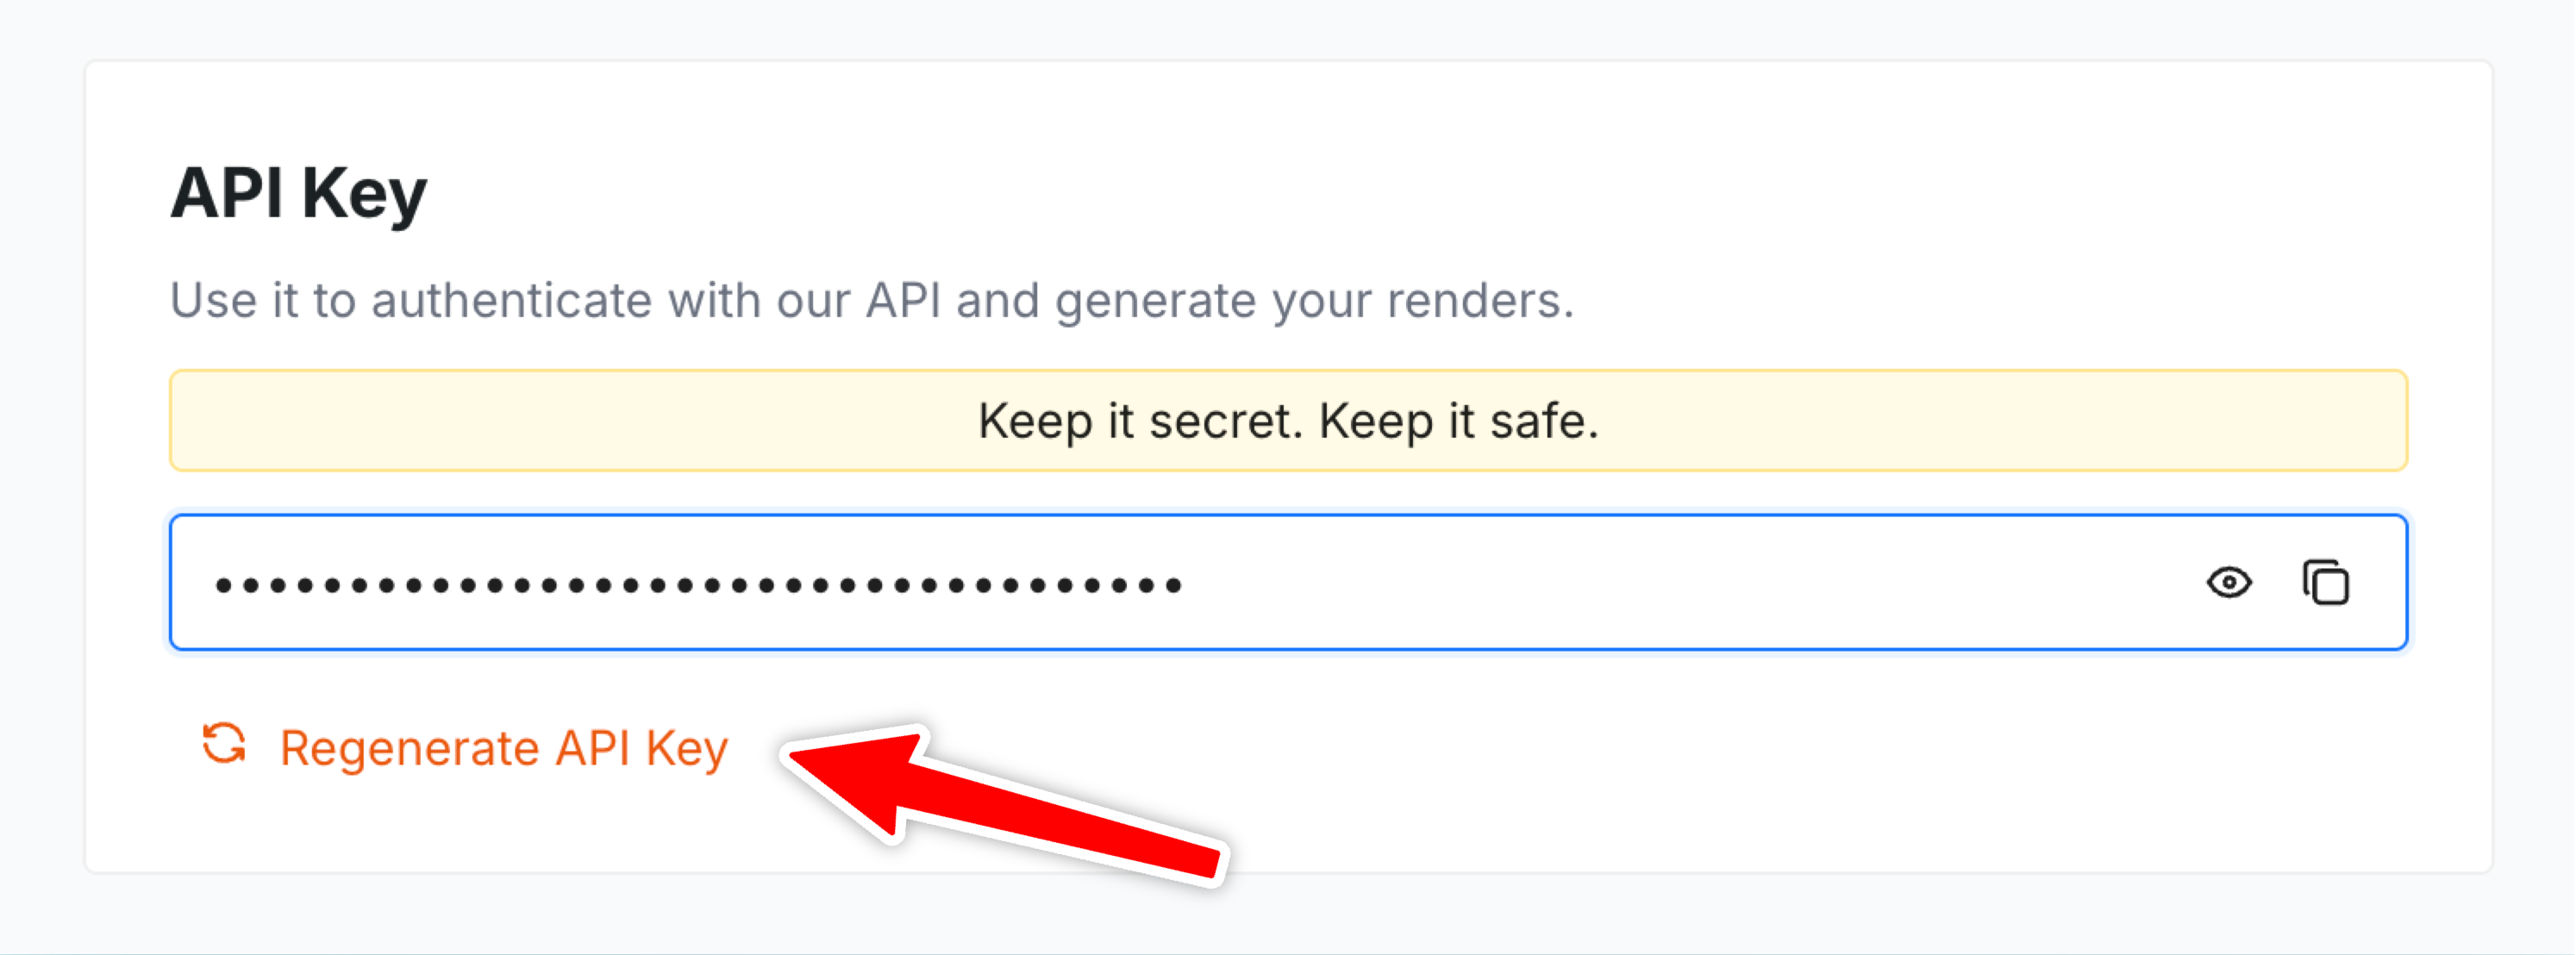
• Regenerate API Key
Need to rotate your API key for security reasons? You can now regenerate your API key directly from the Dashboard. The old key will stop working immediately, so make sure to update your integrations.
• Hide Layer Toggle
You can now hide/show layers in the editor without deleting them.
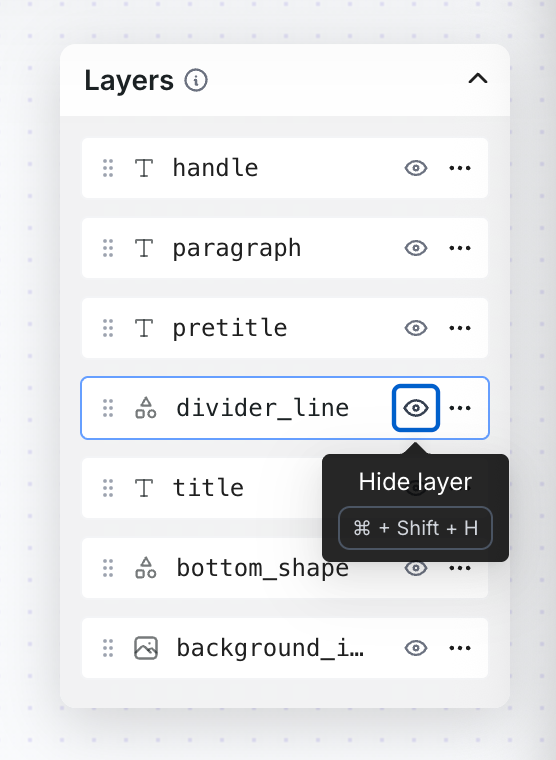
Use the eye icon in the Layers panel or the keyboard shortcut ⌘/Ctrl + Shift + H to hide/show the selected layer.
• Print-ready PDF Options: CMYK & Flatten
We've added two new options for PDF rendering to help you create print-ready files:
CMYK Colors — Converts your PDF to CMYK color space (DeviceCMYK) instead of RGB, essential for professional printing
Flatten PDF — Removes all transparency and flattens layers into a single output, ensuring compatibility with older PDF readers
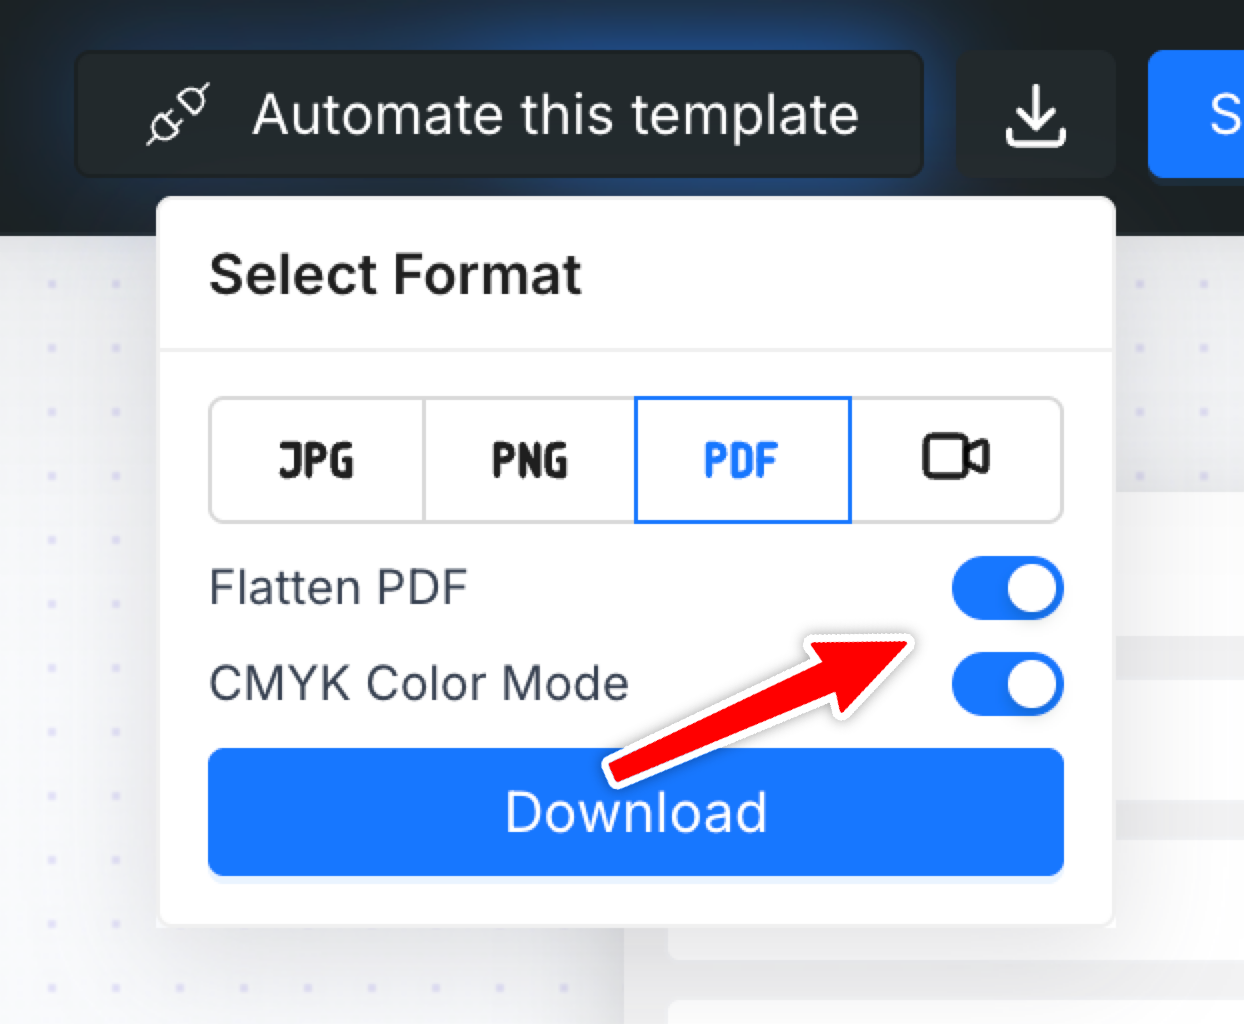
Both options are available in the Editor's Download menu and via the API using the cmyk and flatten parameters. You can find it in the docs here.
• Single-page Mode for Large Templates
Working with templates that have 15+ pages?
Enable Single-page mode from the File menu to significantly reduce memory usage.
Instead of rendering all pages at once, the editor will only render the current page you're working on.
• Bulk Add Tags to Templates
You can now select multiple templates from the Dashboard and add tags to all of them at once. Great for organizing large template libraries quickly.
Just enter selection mode, select your templates, and click "Add Tags" to apply tags in bulk.
Other Fixes & Improvements
Fixed color picker color detection — Colors are now detected correctly even when layer opacity is not at 100%
Select all/Select 50 on Renders page — You can now quickly select up to 50 renders at once for bulk actions like deletion
Fixed Remove BG feature on Embedded Editor — Background removal now works correctly when using the embedded editor
Add outline property to the API — You can now control a Shape layer outline via the API
Add align distribute vertically and horizontally to selected elements — Space elements evenly by multi-selecting and clicking on the Align button. Thanks for the suggestion!
That's it for this November update!
Hope these improvements make your workflow smoother 😉.
As always, let us know what you'd like to see next on the feedback board.
Until the next one,
Pedro
October 27th, 2025
New
Improved

Hey all!
Thanks for all the feedback and suggestions you’ve been posting in out feedback board in the last weeks! It really helps us focusing on what you guys need the most and what will be more impactful for your workflow and automations.
Here’s a quick roundup on all the recent new features and fixes we’ve been working on and are now released in the app and API:
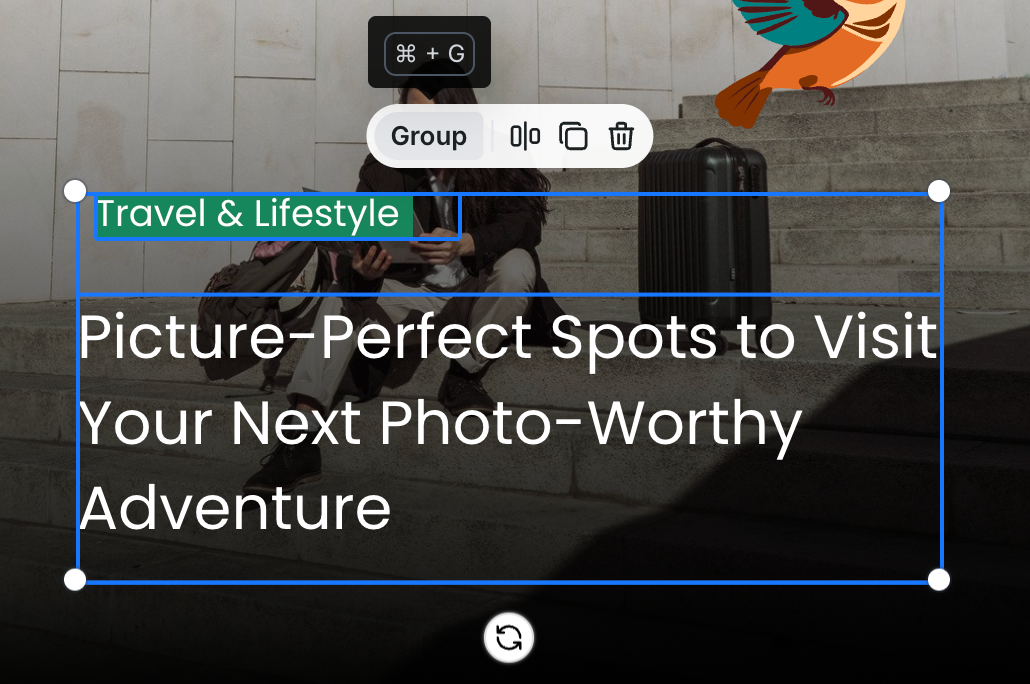
• Layer Grouping
You can now group multiple layers together for better formatting and designing your templates.
Just select multiple elements (with Shift + Click) and click on the Group button or use the Ctrl/Cmd + G keyboard shortcut.
• Show distance between elements while moving
When you drag or move elements in the editor, if you hold the Option key, you’ll now see live distance markers so you can align and space things more precisely.
• Edit Template endpoint in the API
Added a new endpoint so you can programmatically edit templates (not just create/render).
You can send a payload similar to the one to generate a render to modify the template structure. You can find more here in the docs.
• New params in the API Render endpoints
You can now pass line_height and letter_spacing to specify line-height and letter-spacing for text layers.
And you can now scale up or down the final render dimensions by using the scale parameter and control the image output size/scale.
You can check it here in the docs.
• Search by template tags on Dashboard
On the dashboard we added a tag‐based search so you can filter and find templates by your custom tags that we used to organize your templates.
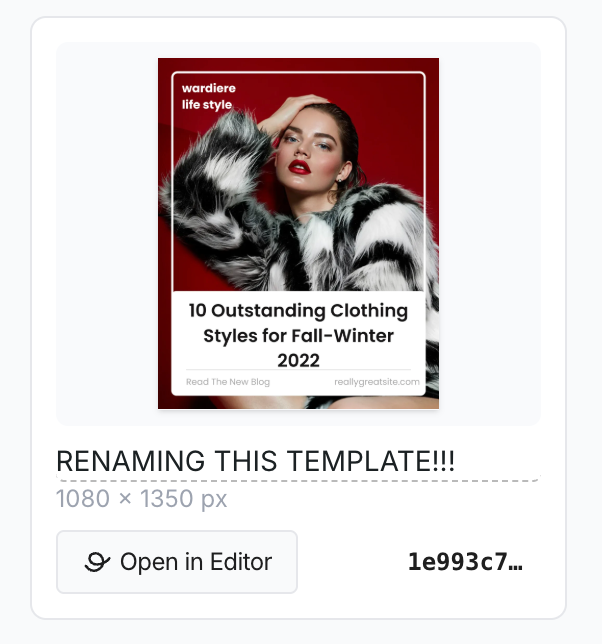
• Rename template directly from the Template tile
No need to open the editor — you can now rename a template straight from its tile in the dashboard UI by just clicking the template name and start typing.
Shapes with dashed and dotted borders
In the editor you’ll now find shape layers that support dashed and dotted border styles (in addition to solid). You can also set different dash widths and spacing.
Other Improvements & Fixes
General performance and stability improvements across the editor and APIs
UI tweaks for smoother workflow in multi-element editing
Minor bug fixes (e.g., correct handling of custom asset URLs, improved typo corrections in dashboard)
Add external ID filter param to list template clones via API
That’s it for this update.
Hope these enhancements make your workflow better!
Until the next one,
Pedro
October 14th, 2025
New
We're excited to announce a long awaited feature that makes it easier than ever to turn your Canva designs into dynamic, data-driven templates!
✨ What's New
Import from Canva is now available in Beta to all users! You can now import your existing Canva designs directly into Templated and transform them into powerful, automated templates.
🚀 How It Works
Open your design in Canva
Click the Share button in the top-right corner
Select Public view link from the dropdown
Copy the URL and paste it in the Import from Canva screen
Wait for the import to finish (~90 seconds)
Open the imported template in our Editor
Watch our quick demo video (above) in the import wizard to see exactly how to get your public view link from Canva!
💡 What Gets Imported
When you import a Canva design, we automatically convert:
Text layers (with fonts and styling)
Images and graphics
Shapes and vectors
Colors and backgrounds
Layout and positioning
Multi-page designs
The entire import process typically takes 60-90 seconds (depending on the number of pages and details in the design), and you'll see a live preview of your imported template before opening it in the editor and you can work on any adjusts and changes to the template after that.
This is still a Beta feature so please don’t expect that your design will be migrated with 100% accuracy, but we hope that helps you to quickly migrate, design and automate your assets.
Please let us know if any feedback or issues.
Until the text one,
Pedro
October 6th, 2025
New
Improved
Hey there!
Just a quick update to let you know what we’ve been working, our recent new features, bug fixes and improvements.
We’re always listening to your feedback and suggestions and we even added a new board where you can summit your ideas, report bugs and follow our roadmap:
👉 Check our feedback board and roadmap here!
• Copy and Paste layers (including between tabs/templates)
You’re now able to Copy (Cmd + C) and Paste (Cmd + V) layers.
That’s particularly useful when you need to duplicate elements to a different page or even to a different template that you can open a different browser tab.
• Multi-Select Resizing
Select multiple elements or layers at once and resize them all together using the corner handles. This makes batch editing much faster and more efficient.
• Uploaded SVG Color Control via API
You can now control uploaded SVGs fill and stroke directly through the API. This gives you more flexibility when working with uploaded assets programmatically.
• Endpoint to Delete Uploads
We've added a new endpoint that accepts a list of upload IDs for deletion. This is perfect for workflows where you need to temporarily upload files and clean them up after your process is completed. You can find it in the docs here.
• Multiple Levels of Text Boldness
Text layers now support multiple font weight levels including thin, normal, semibold, bold, and extrabold. This gives you more precise control over your typography.

• Bulk Actions on Templates and Renders
You can now perform bulk actions directly in the dashboard:
Templates: Add to folder or remove multiple templates at once.
Renders: Download or remove multiple renders in one go.
This makes managing your workspace faster and more convenient than ever.

Improvements and fixes:
Enhanced API flexibility for upload management
Streamlined multi-element editing workflow
Better resource cleanup options for temporary uploads
More granular text styling controls
Show angle while rotating elements
That’s it for this update 😉
Hope it improves your workflow and your automations.
Until the next one,
Pedro